


Hello fellow users,
Our latest update for Trados Team was recently deployed in production. Find below a summary of the new features and improvements that have been delivered as part of this release.
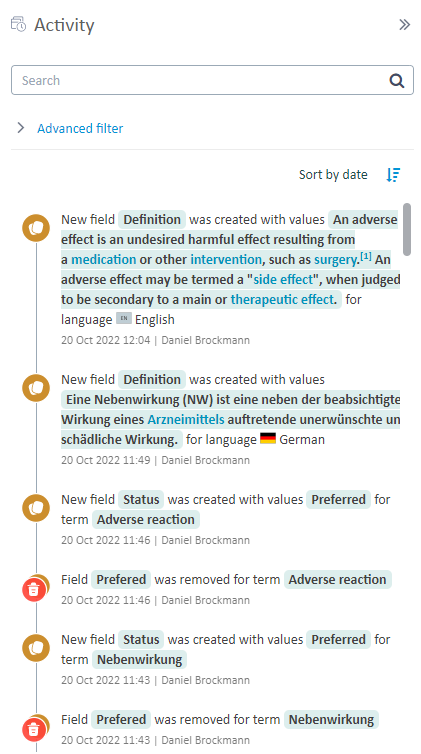
Terminology Activity Log
In our cloud terminology capability, we have introduced a new activity pane that will give users with appropriate permissions an overview of who changed what and when in a terminology entry. This gives terminology stakeholders full traceability and control over any terminology entry and all the changes over its lifetime.
UI (User Interface) Grouping from Project Stages and Inbox
In a previous release, we introduced a new option to visually group tasks from the Project > Stages view, according to various fields. We have now delivered further improvements and optimizations to the way this information is presented. For example, instead of displaying a solitary flag icon when grouping by language, we display the actual name of the language alongside the flag. Similarly, the full name of assignee(s) is now displayed instead of just their initials. In addition, we now display separate groups, where relevant, which include tasks that don't match with the selected grouping criteria. For example, if you choose to group by target language but you have tasks at source file level that don't have an associated target language, these tasks will now be displayed in a separate group, whereas previously, these tasks would not have been displayed at all.

We have also extended the grouping functionality, so it is now available from the Inbox in Trados Team. From the Inbox, it is possible to group tasks by Project, Task Type, Source and Target Language. We are also working on the ability to group tasks based on Assignee from the Inbox and this will be available in a future release.

TM (Translation Memory) Search in Customer Portal
This latest release includes a new TM Search feature that allows users to search for content directly in their TMs. When performing a search, users can specify the type of search (TM Lookup or Concordance), the source and target language(s), and specify the minimum match quality and number of results that should be returned. The search results provide details on the TM in which a match was found, any match differences between the search text and the source string, and any penalties that are applied at TM or sequence level. Users can also expand each search result to reveal additional information about that segment, such as the date it was added to the translation memory, who it was created by, and how many times the segment has subsequently been used.
The TM Search feature is available for all users that access Customer Portal. As part of this feature, however, we have introduced a new user permission in Trados Team (Customer Portal > TM Search via UI) that can be used to control access to this feature, where required. By default, the new permission is included for the following roles:
- Customer Requester
- Customer Requester (Restricted)
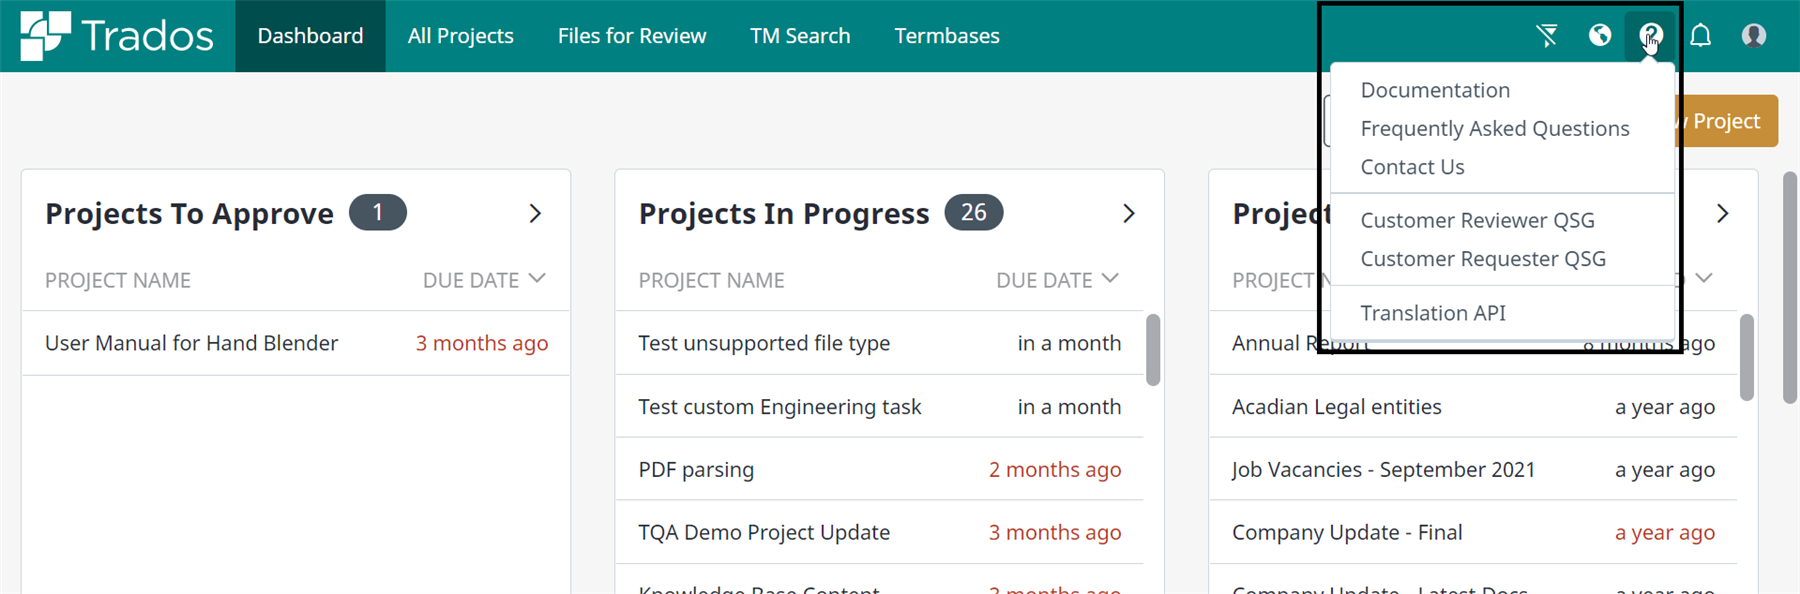
Customer Portal Help
We have improved the Help links available from Customer Portal, so they are more consistent with the way this information is presented in Trados Team. The “Documentation” link from Customer Portal now takes you to the main RWS Online Documentation Center and will take you directly to the relevant section in the documentation, depending on the role of the user (Customer Requester or Customer Reviewer). In addition, we have added Quick Start Guides for the available roles, which can be downloaded from the Help menu in the Customer Portal.
Additional Items
- For files that include segment(s) with over 2000 characters, we now create an error task so that a user can reduce the segment size.
- For users that have access to more than one account in Trados, the name of the account you are currently logged in to can be displayed from the header bar. Not only that, but you can also switch to a different account, also directly from the header bar, to avoid unnecessary clicks when navigating to the user menu. If you prefer not to have the account details displayed in the header bar, you can toggle this on or off by clicking on the “pin” icon alongside the Switch Account option in the user menu.