If you have followed my presentation about DXA and the future at the Tridion Developer Summit, you will have seen me demoing how you can launch a DXA web application from the Azure marketplace. In this post I'll recap all the steps for you, so you can play with DXA development yourself pretty quickly.
Step one - create the app
So the first step is easy (as long as you have an account), you can either go to https://portal.azure.com/ and open the Marketplace via your dashboard, and then search for dxa. You can also just follow this direct link and create a DXA Web app directly. In case you don't have an account for Microsoft Azure yet, you can create a free one and get started with free credits even.
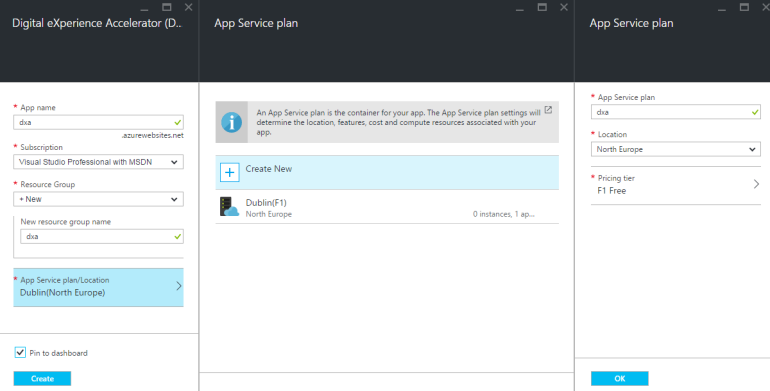
Once you have clicked the Create button, you need to give your application a name (this has to be a unique name, as it will be used in the URL), choose a subscription (in case you have multiple) and create a new resource group (or choose an existing one, in case you have those). The last step here is where you choose your App Service Plan and Location of the app.
The picture below shows the fields you need to fill for the web app and service plan. I've chosen the location North Europe since the CIS service is located in SDL's European cloud which is hosted from Ireland (and North Europe on Azure is also Ireland).
Now just click [Create] and your application will be provisioned and launched. Be sure to have checked the "Pin to dashboard" box, so you will easily find it back in your dashboard. Else you will get a notification as soon as it is ready, or you can find it back in the "All resources" and "Recent" lists.
Step two - add local Git repository
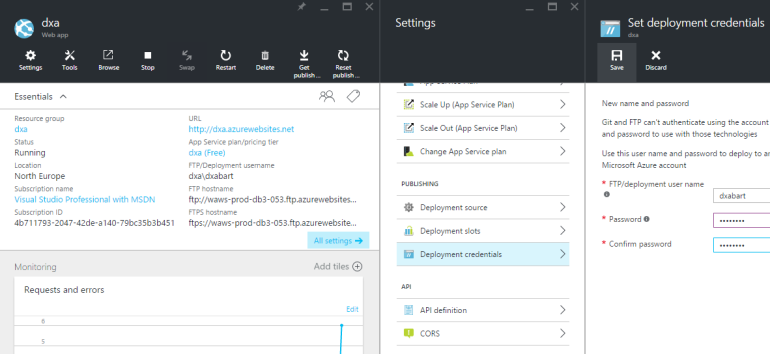
Once your Web app is started, you can open it and see the properties. In here you will find the URL and status of the app, and you can proceed to all settings for further configuration. What we want to do is add a local Git repository, so you can make changes to the application (like connecting it to your own CIS backend).
So proceed to your Web app and click [All settings], on the left, under PUBLISHING, you can now select "Deployment credentials" and setup a user account and password that you can use for FTP and also Git access to your application. See the picture below for how it looks, and don't forget to press the Save button above, to store these new credentials (if you have already set credentials once before on this account, you can skip this step and simply use those).
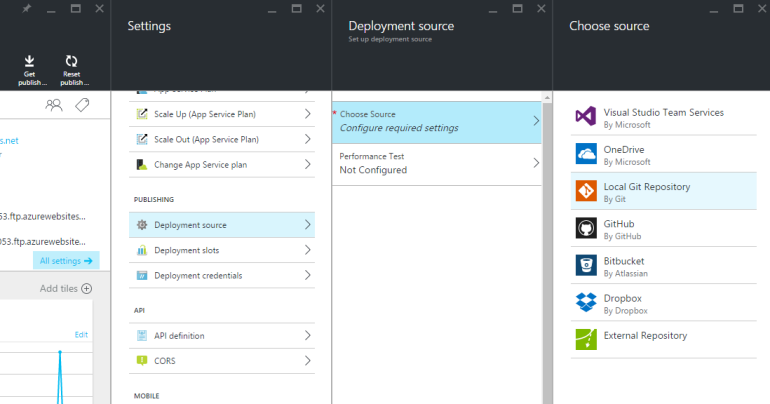
Now under PUBLISHING, you can select "Deployment source" and on the right choose a source, in the list you will find several options. I will use "Local Git Repository" since that seems to be the most straight forward one to use. See the picture below for details again.
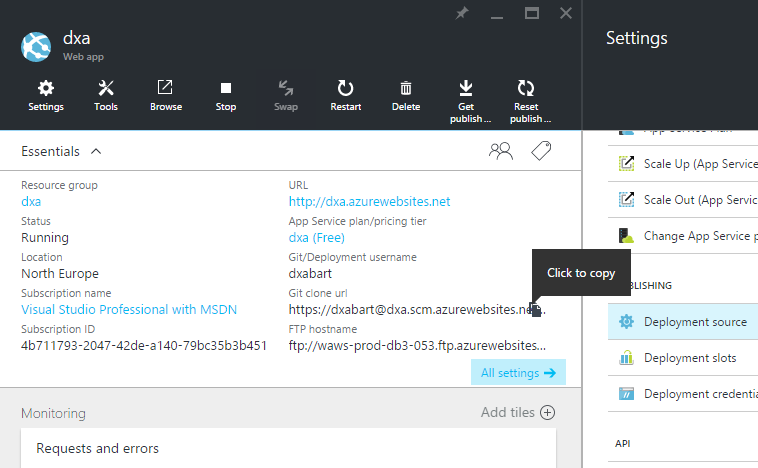
After this step, you will see a Git clone URL that you can copy, and use in your favorite Git client. You might want to simply use Visual Studio, since then you can directly take a look at building, and changing what you need.
Step three - building and debugging
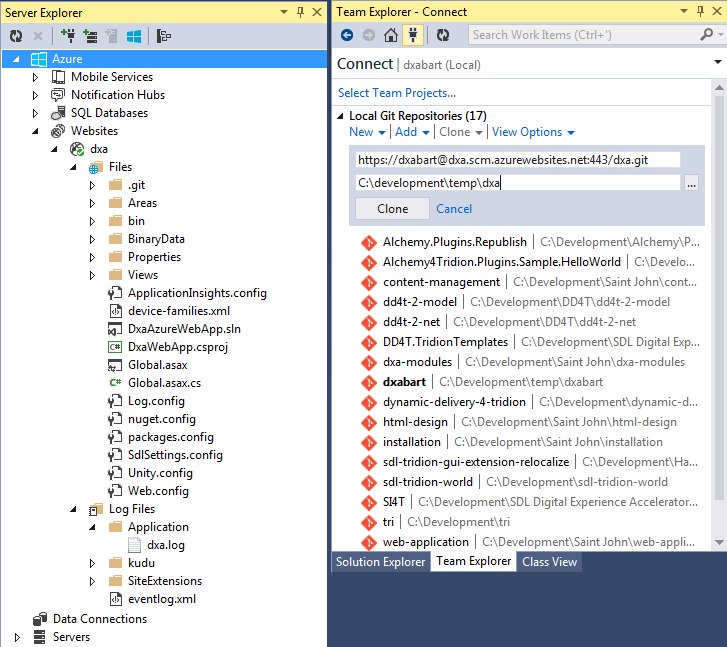
In Visual Studio 2013 professional you can find an Azure node under the Server Explorer, and under Websites, you should see your Web app once logged in (with your Microsoft Azure account). Bbefore we focus on all the files here, lets clone our Git repository and load the sources so we can actually play with them. Under Team Explorer, you can select the "Connect to Team projects" button and Clone a Local Git Repository. Fill in the Git clone URL that you copied and enter a location on your hard drive where you want it to be stored locally. Press the [Clone] button and enter the FTP user name and password for which you created credentials in step two. Now your Git repo is cloned locally and you can open it by double clicking the repo and then double clicking the DxaAzureWebApp.sln file.
Now you can build, and then we can attach a debugger to do a remote debugging session. Know that this does require you to have certain ports opened in your outgoing firewall, on Stack Exchange it is mentioned that you have to open up ports TCP 4018-4019 (so outging traffic allowed from the machine you are running Visual Studio on, Azure already allows the inbound traffic from anywhere on these ports).
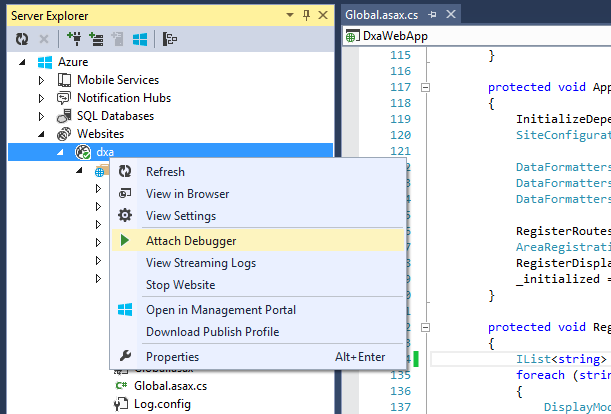
In the Server Explorer, under Websites, right click on your Website and select "Attach Debugger". That is all, now set a breakpoint somehwere and see it being hit. The below picture it rather pointless, but added for extra clarity, so you can't miss it.
Step four - connecting your own CIS
Now that you have everything working you will want to take this next step, so you can actually show your own content. For this you need to connect to your own Discovery service, or CIS (Content Interaction Services).
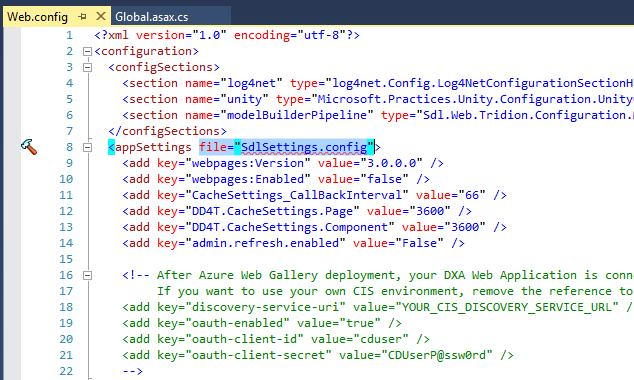
Open the Web.config file in the solution, on line 8, remove file="SdlSettings.config" from the appSettings element (this points to the SdlSettings.config file where we have the read-only Discovery service credentials and the Topology Manager mapping service configured in, which we use to auto register the URL of each DXA Azure Web app that is launched).
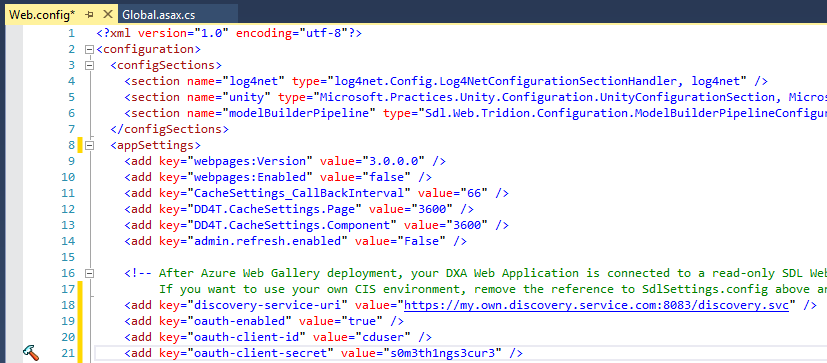
Now on line 16-22 of the Web.config file, remove the comment and fill in your own Discovery service URL and its oauth credentials. Simply save the Web.config file, commit and push/sync your changes and your Azure DXA Web app is connected to your own CIS. Make sure you have published all pages as described in the documentation, and you should be all set.
Please note that if you want to use our Discovery service, we might restrict it to only accept registration from localhost and azurewebsites.net domains. This service is delivered free of charge and doesn't come with an uptime guarantee.

 Translate
