I have just released my kickstart environment for DXA.Java, which I’ve used in a number of partner workshops and customer demos. This is a all-in-one environment including deployer service, OData preview web service, Tomcat and a ready configured DXA web application. This blog post will describe how you setup the DXA.Java kickstart environment.
- Tomcat 8.x
- DXA.Java web application with all needed configuration
- OData Preview web service
- SDL Tridion Deployer service
- Hypersonic in-memory broker database
Before you start
- A vanilla SDL Tridion 2013 SP1 HR1 instance (is not needed to be on the same machine)
- Java 7/8
- Java IDE such as IntelliJ IDEA, Eclipse, Netbeans etc
- Maven 3.x
- Git
Setup
To setup the kickstart environment you need to do the below described simple steps. Each step is composed a of a serie of automatic actions such as cloning GIT repository, install JARs into local Maven repository, assembly a Tomcat instance etc. I have also recorded a short video of the steps you need to take here: https://dl.dropboxusercontent.com/u/4726100/DXA-Kickstart-Setup.mp4
Step 1: Prepare environment
dxa/code> git clone https://github.com/NiclasCedermalm/dxa-kickstart
- 'dxa.home' - path to your created DXA directory
- 'dxa.licensePath' - path to your cd_license.xml file
Step 2: Install DXA code
Install all DXA source code + needed dependencies by doing the following in the dxa-kickstart directory:
dxa/code/dxa-kickstart> mvn install -Pinstall-code
Right now the build system is configured to use my forks of DXA and DXA modules (at https://github.com/NiclasCedermalm) as there a number of pending bugs. As soon R&D has included those bug corrections in the official SDL Github account, I will release an update of this build setup.
Step 3: Install DXA publications
Copy the 'dxa-dist\import\DXA Application Data Definition.xml' file and paste it to: %TRIDION_HOME%\config\ImportExport\ApplicationData. Run the following in PowerShell directly either in the dxa-dist/import-directory or on the SDL Tridion host (if you are using a non-Windows laptop):
dxa/dxa-dist/import> .\import.ps1 -importType all-publications -cmsUrl http://[TRIDION_HOST]
Run the script again to install the DXA standard roles:
dxa/dxa-dist/import> .\import.ps1 –importType rights-permissions –cmsUrl http://[TRIDION_HOST]
Verify so the DXA publications have been created in Tridion.
Step 4: Install Tomcat
Modify the env.properties file and update the publication ID property (dxa.publicationId) to match the newly created publication '400 Example Site'. Run the following command to install a complete DXA.Java distribution including Tomcat and embedded Broker DB:
dxa/code/dxa-kickstart> mvn install -Ptomcat
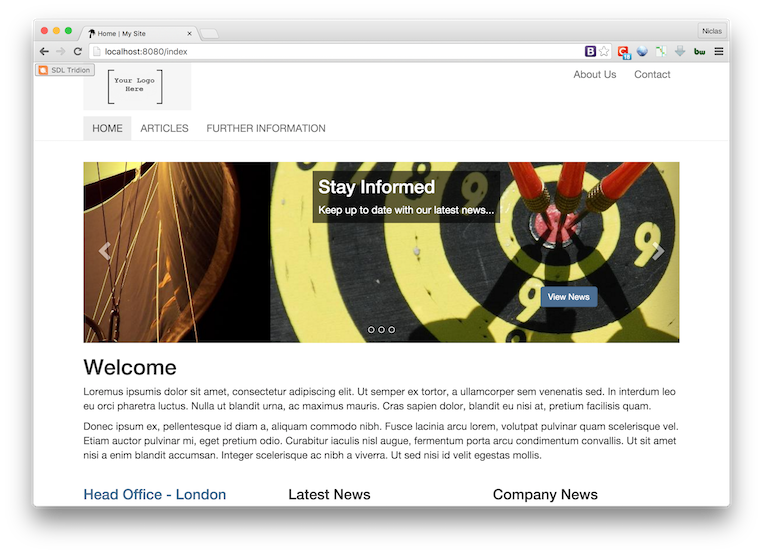
Start the Tomcat server by go into the 'dxa-tomcat\bin' directory and start 'startup.bat' alt. 'startup.sh'. Wait for the server start up. Verify the installation by go the following URL in a browser: http://localhost:8080/cd_upload/httpupload
Step 5: Publish DXA Example Site
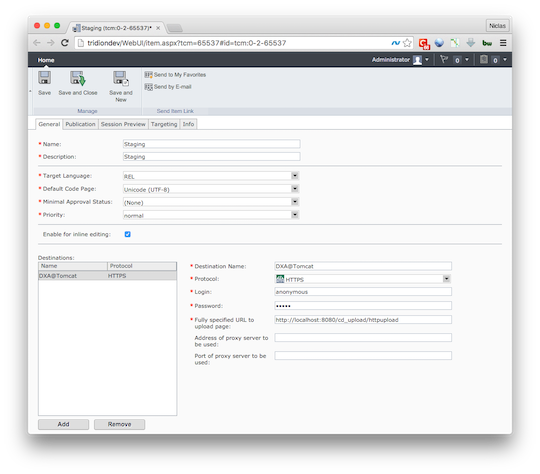
- HTTP destination: http://[DXA_HOST]:8080/cd_upload/httpupload
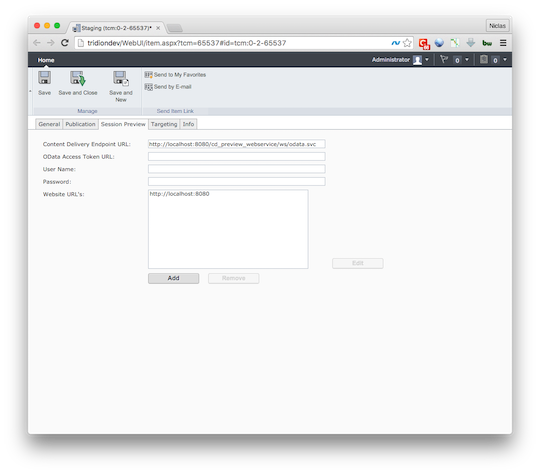
- Session Preview - Content Delivery Endpoint URL: http://[DXA_HOST]:8080/cd_preview_webservice/ws/odata.svc
- Add 'http://[DXA_HOST]:8080' to Session Preview - Website URLs
- /admin/refresh - Refresh the DXA configuration and clears the cache
- /admin/adf-claims - Displays all current ADF claims
Setup DXA development environment
To setup DXA development environment in an IDE such as IntelliJ IDEA or Eclipse you can do the following:
- Import the dxa-web-application-java (optional) & dxa-kickstart maven projects into the IDE
- Create a Tomcat configuration and point to the Tomcat instance in the 'dxa-tomcat'-directory. You do not need to specify any specific JVM options as they already are pre-set in the Tomcat installation (setenv.sh/setenv.bat).
- Add the dxa-webapp to the Tomcat configuration
- Run the server from within the IDE
There is an example module included in the kickstart project, which you can take a look on if you are interested. I will describe this one in more detail shortly in a next-coming blog post.
I hope you find the kickstart project useful and help you to get started on using DXA.Java.

 Translate


