In the last post, we covered SDL Web 8 features. This post gives a sneak peek at the new functionality in SDL Web 8 and the related user interfaces.
Disclaimer: We are finalizing the current release; some details will probably change. Though the following information and screenshots represent SDL Product Management and R&D plans, unreleased software features cannot be guaranteed to be in the next release.
Introducing an intelligent Sites dashboard
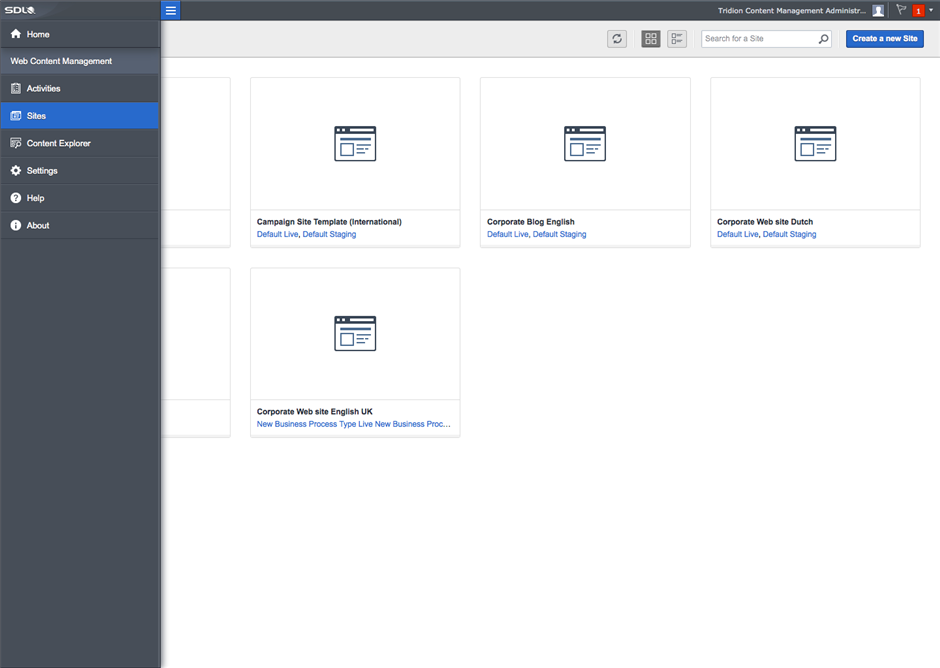
SDL Web has always been good in sharing and re-using of structure and content through the use of BluePrinting and Publications. This enables our customers with easy organization of content and enormous flexibility. However, the end result is Web sites with various purposes like localizations or micro sites.
With the introduction of the Sites dashboard, we make the visibility of the resulting Web sites more tangible. Every site created through the use of Topology Manager functionality is now automatically exposed within this Sites overview dashboard. This will benefit the end users who work within the SDL Web product on a daily basis and make the access to their work environments easier.
We've made sure the different publishing environments for each site, like Staging and Live, are accessible from the Sites overview.
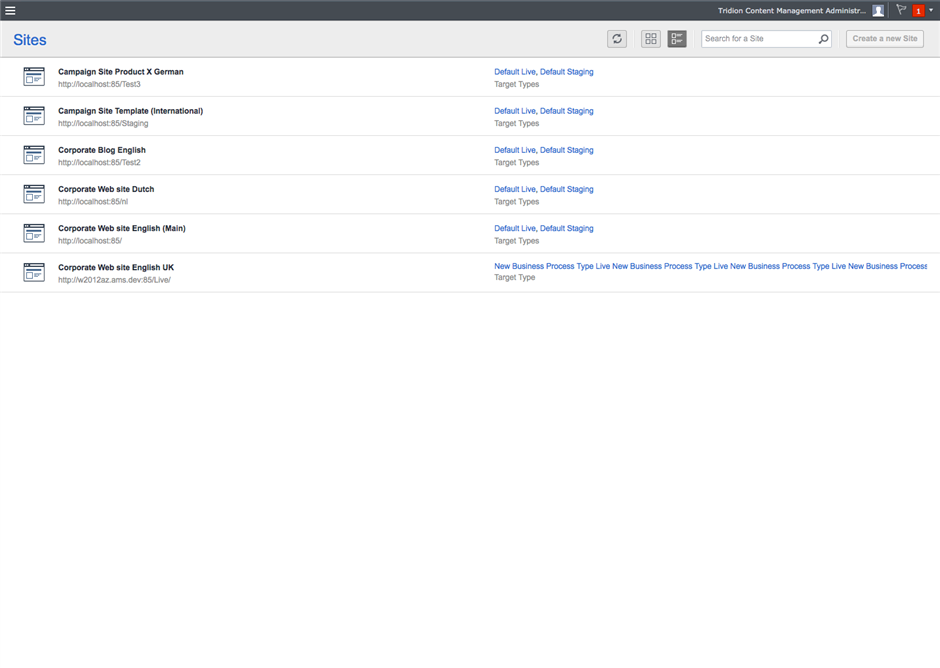
The Sites overview can be switched to a list view that shows more detailed information if a customer has a large amount of sites.
As you probably have seen, from the Sites overview, a new site can be created.
Instant Site for creating a new site
Flexibility is the power of SDL Web. We are aware though that as a result, creating Web site Publications in SDL Web usually requires expert knowledge. But as we saw that the process for creating Sites is mostly the same process for all our clients and users, we have added a new feature called Instant Site.
Through the use of a step-by-step wizard, we simplified and unified the process of creating a new Site into one guided flow that entails six easy steps.
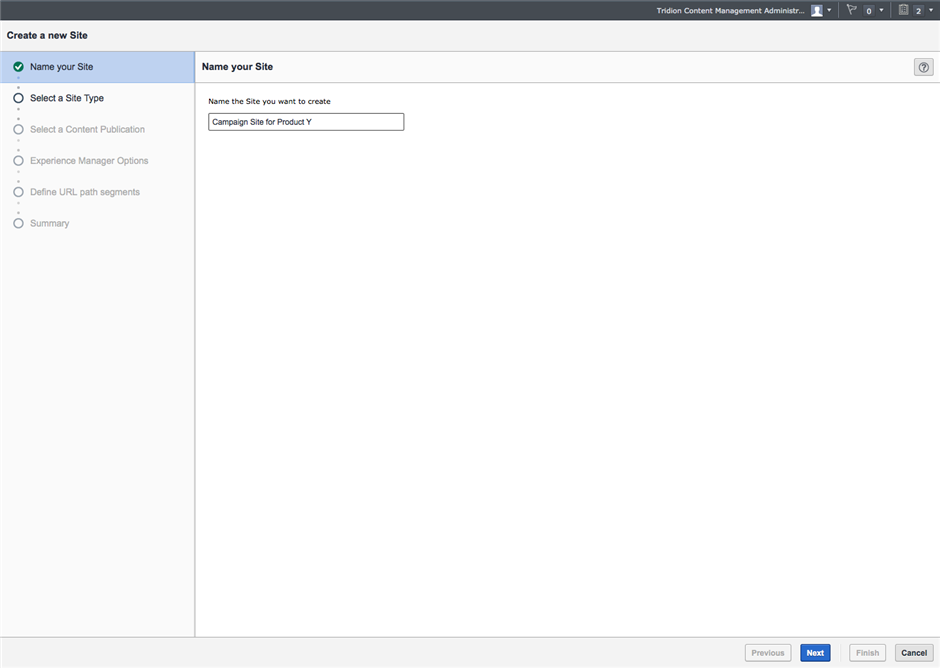
Starting the Site creation process
As you can see the screen displays the steps that need to be taken. We spend quite some effort in providing direct validation and make sure the process is intuitive and easy to understand.
The first step is providing a site Name that will be reflected in the Publication and Publication Key.
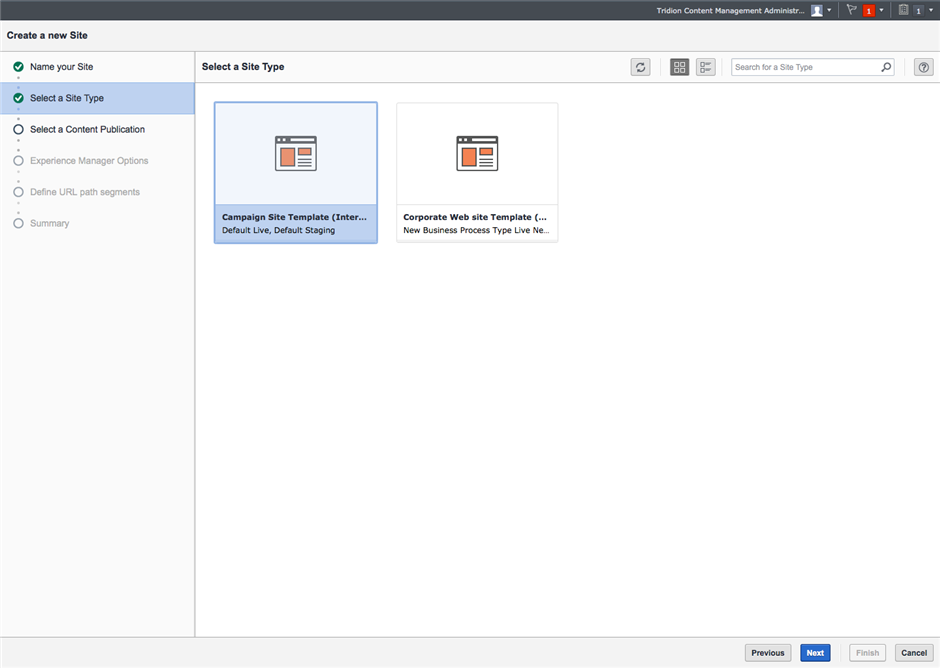
The Site Type concept
The next step is picking a Site Type. A Site Type basically is a default configuration that can be used for creating a new Site. It contains defaults like functionality, capabilities, site layout and structure. Some examples can be a “localized site”, a “microsite” or a “blog”.
An implementer or consultant defines the Site Types that are applicable to the company and their unique needs as a one-off activity.
Picking a Content Publication (or not)
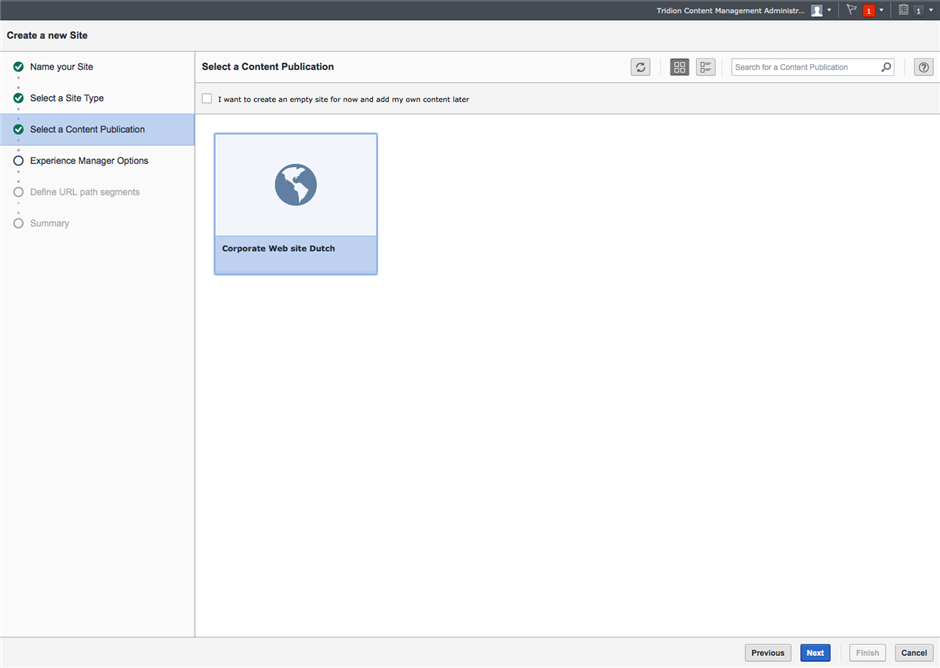
After choosing a Site Type, the user can select a Publication that contains content. For example, English or German languages can be selected in this step. Every Publication within the BluePrint hierarchy that is marked with the Type Content will show up in this list.
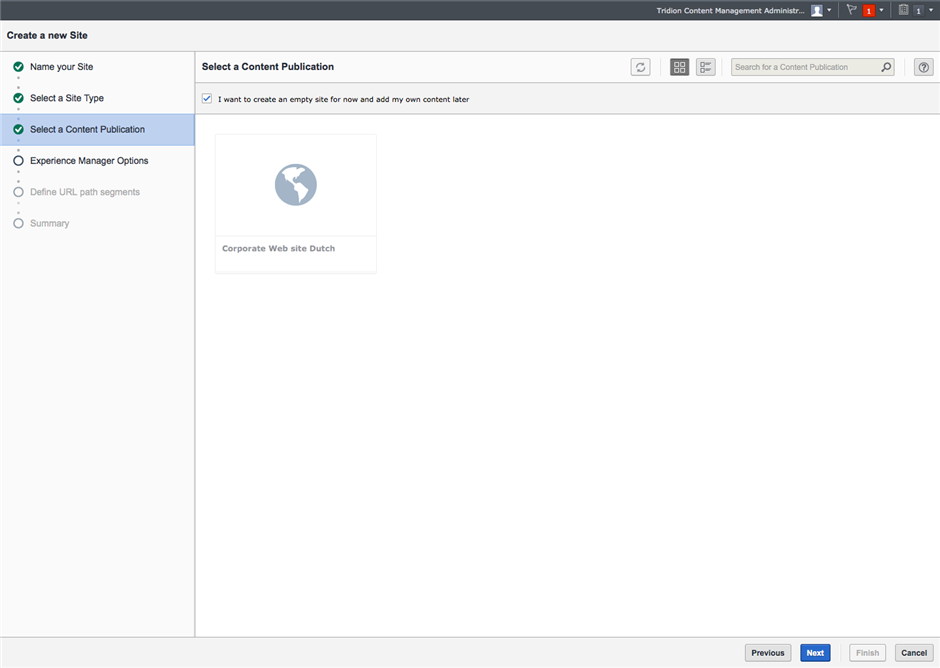
Another option is to select no Content Publication, and manually add a Publication later.
Options for the Experience Manager
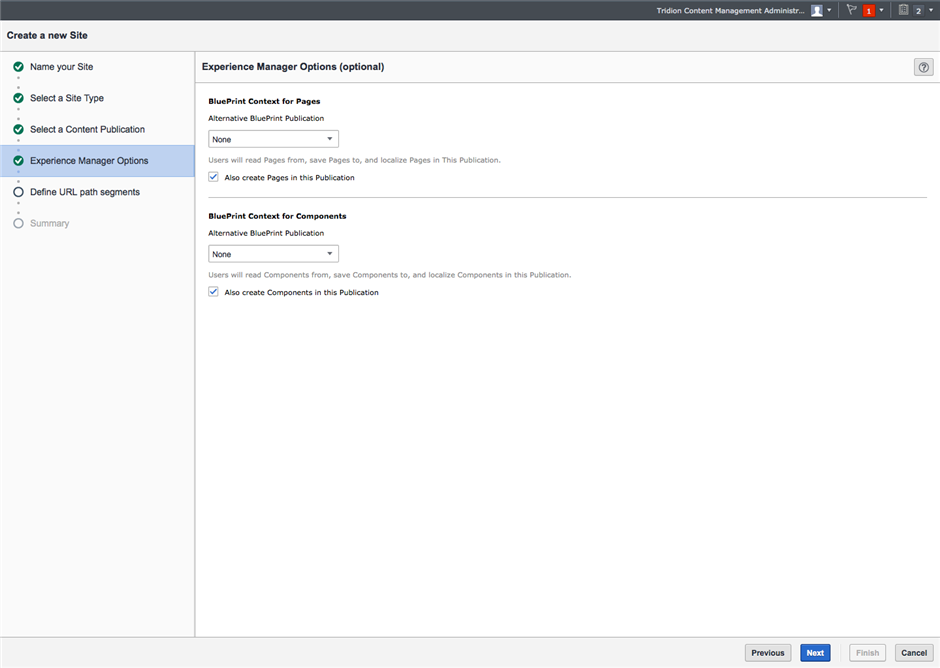
If Experience Manager has been enabled, some basic options for editing the site in Experience Manager can be configured (otherwise this step will not be visible in the creation process).
The user can define where all content needs to be placed. In most customer implementations there is a separate Publication for the content that is specific for Experience Manager.
Configuring the Site URL paths
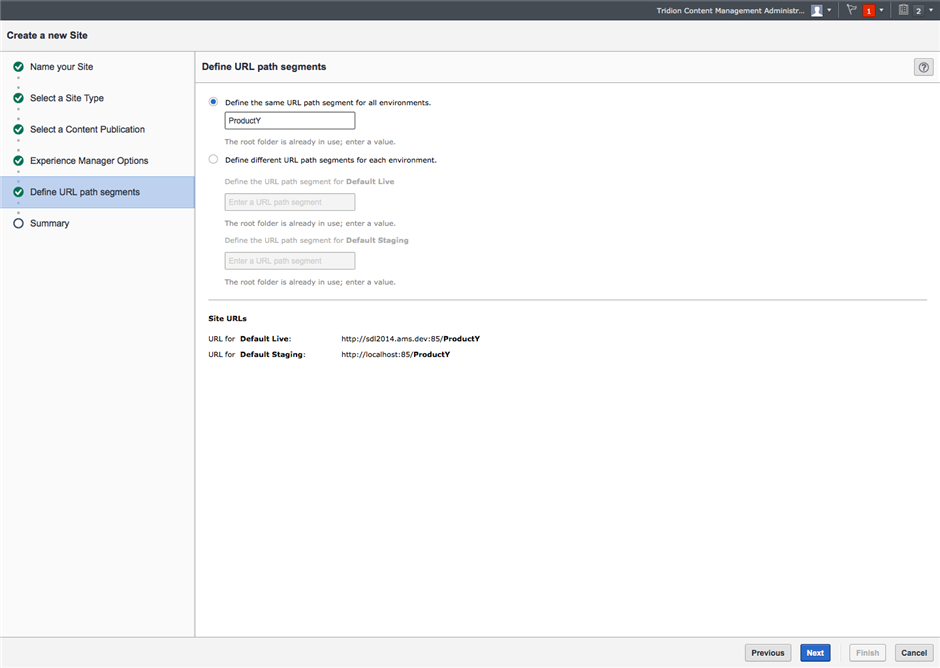
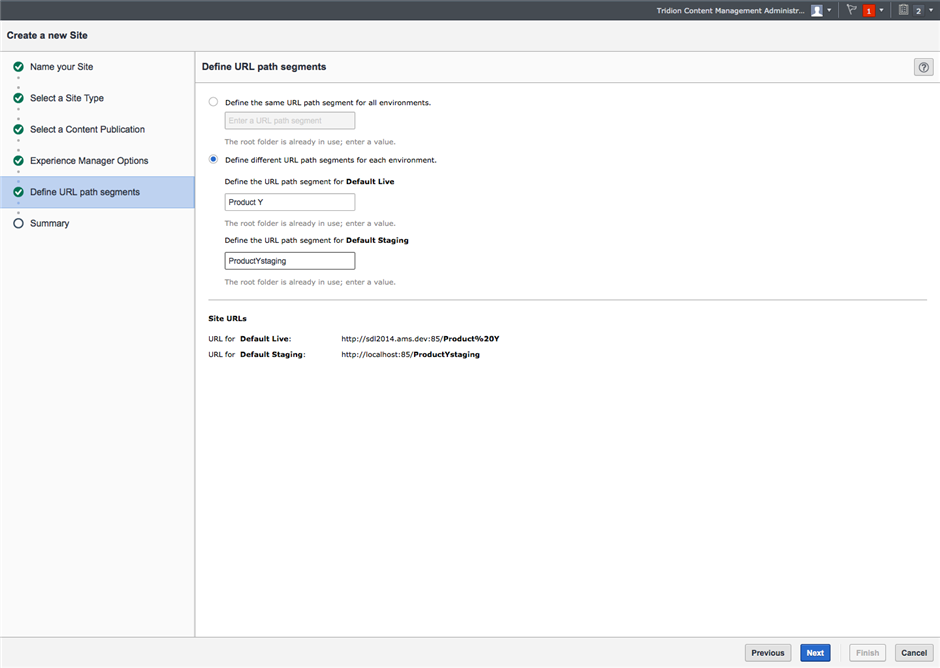
The next step is the most powerful part; we give the ability to directly create a URL path where the site should be accessible, on each environment. The available site URL’s depend on the selected Site Type, which dictates where the site can be created. The input is directly validated by the system and detects if the URL's provided already exist or are allowed.
The default option is to provide the same URL path for the various environments (Like Staging or Live). In most use cases the sub path is the same for each environment.
It was important to us that the results are directly visualized within this step, which you can see at the bottom of the screen.
We give the flexibility to define a unique path for each environment, this can simply be done by toggling the radio buttons. This can be useful if there is only one environment for all the staging sites within the implementation.
Finishing the wizard
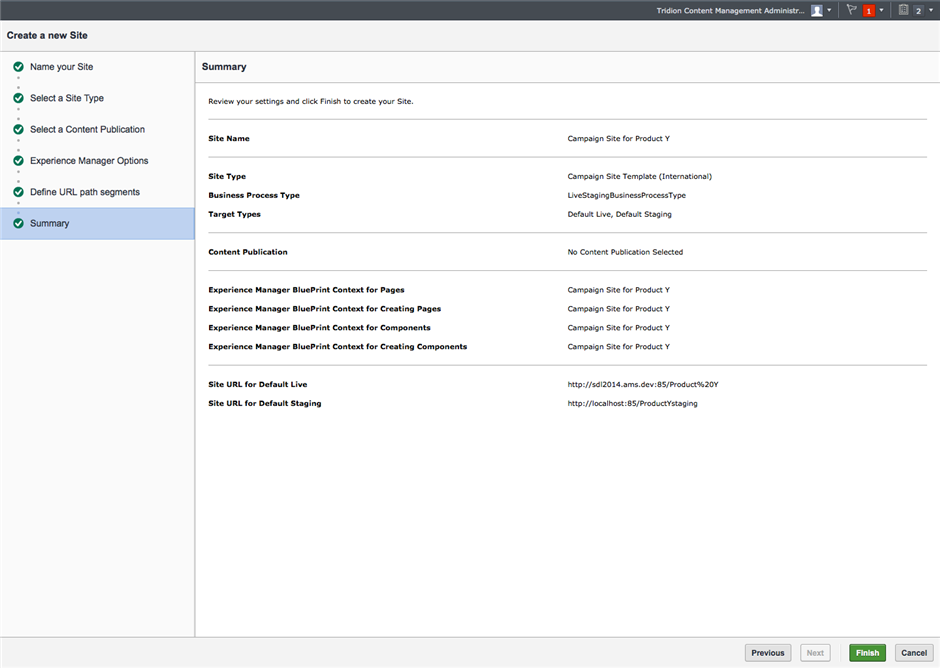
Finally, a summary lets the user confirm the provided settings before creating the new Site and all its corresponding building blocks.
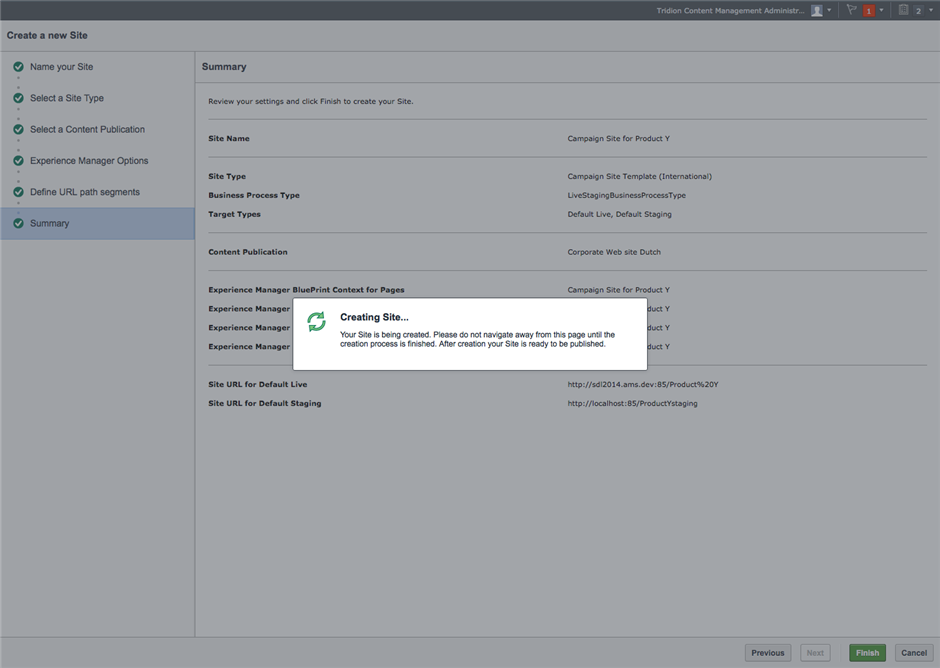
If the provided information is valid, the user can finish the creation process and create the new Site.
After pressing “Finish” the user will be redirected to the Sites overview. The site will appear in the list.
Overall, the Site set up wizard is extensible will be extended with additional features in the future.
Promoting and Demoting items
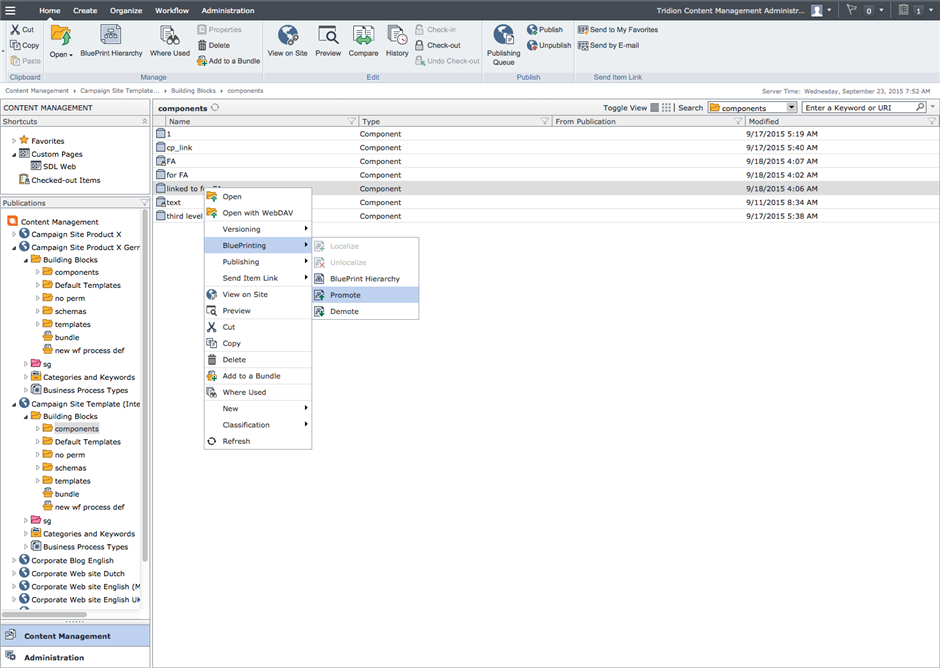
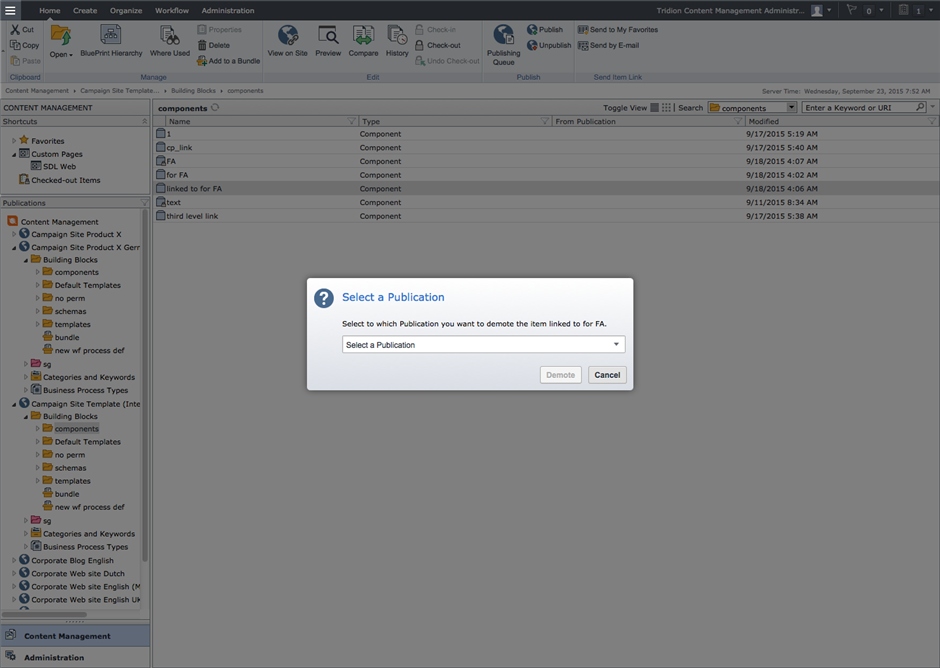
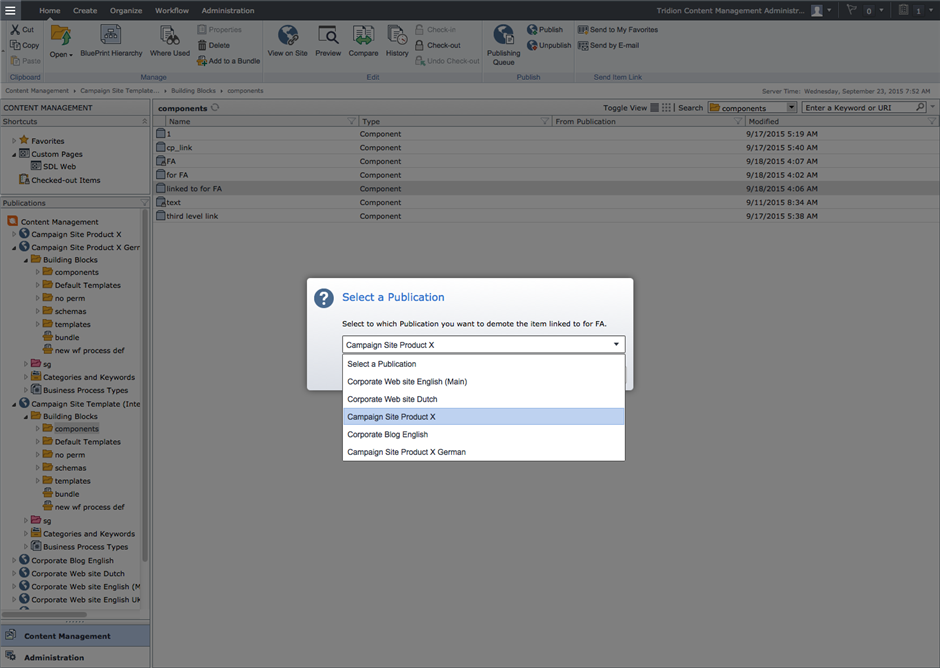
Available in the API and in the Content Explorer, Promote and Demote are two new features that let you move items up or down a BluePrint hierarchy, respectively.
Good example use cases for this feature are when you would like to reuse locally created content across the organization by promoting it to a higher level and then sharing it across other Publications. But is also comes in very handy when you’ve accidentally created items in the wrong Publications or when you need to adjust where items should “live” in a BluePrint hierarchy.
The function is available in the Content Explorer, underneath the BluePrint section.
Due to dependencies on other items, we think it is important that the user is informed and knows what happens when they Promote or Demote. We therefore spent quite some time to make sure to show the right actionable warning and error messages.
Note that the promoted or demoted items are not copies and standard reference requirements apply. For example, you cannot move a Component up above its Schema definition.
The functionality displays the available Publications to Promote or Demote to.
Open items within a Web site
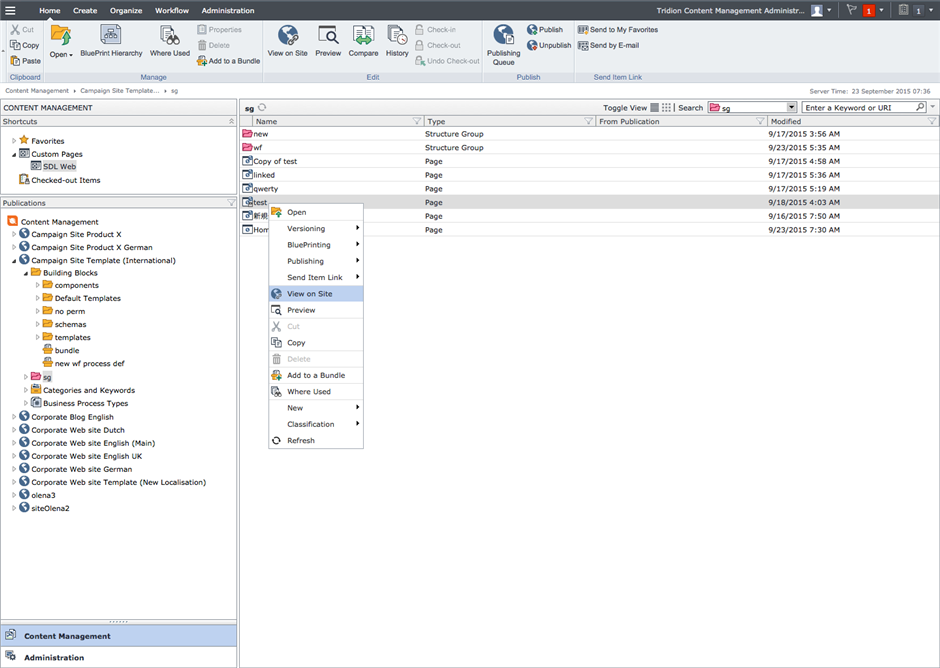
The View on Site feature gives the possibility to view a Component or Page directly on a Published site. We know that many of our customers provide their own custom solution for linking directly to, for example, a Staging environment. It is important for us that this is part of the default functionality within SDL Web.
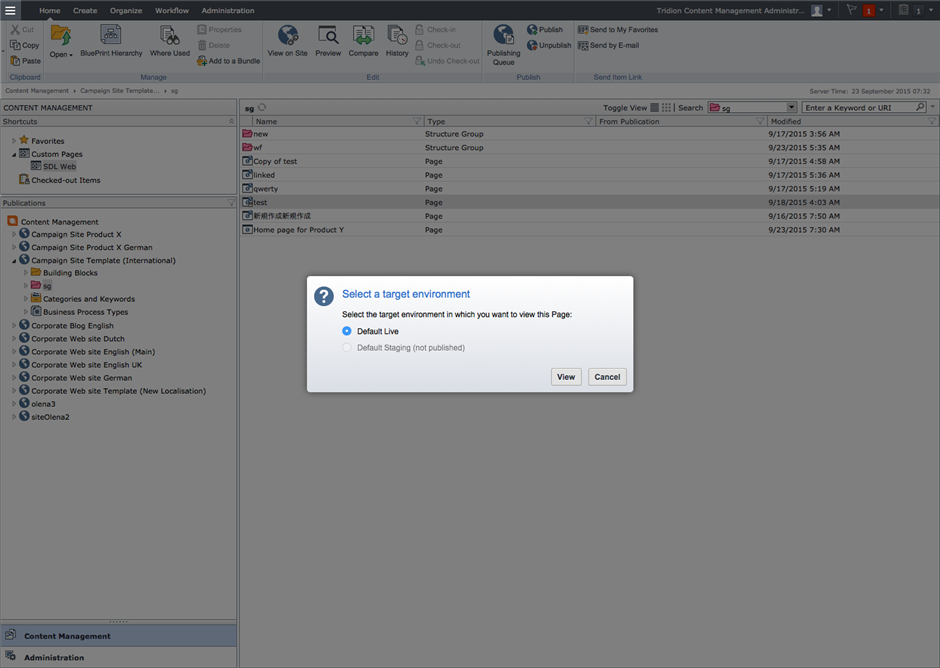
Viewing Pages
The View on Site functionality is accessible from the Context menu and Ribbon toolbar, when an item is part of a Site Publication.
When pressing Promote or Demote, a dialog is shown. Viewing pages is quite straightforward; we show the amount of environments the Page is Published to. The user can directly open up the Page in a new browser tab and see it in action on the selected environment.
Viewing Components
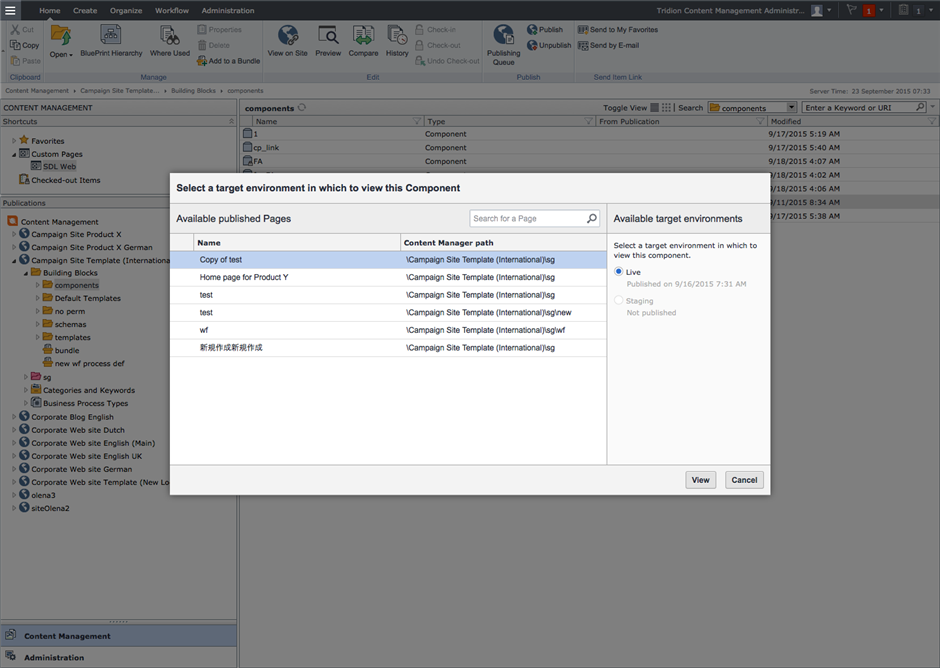
Viewing Components requires another step, we give the option to select a Published Page where the Component “lives”. We made sure there is one pre-selected value, so that previewing a component in a real site can be accessed quickly. We added some useful features like search and more details regarding the Page and Component.
Summary
As you can see, with this release, one of the goals was to make SDL Web user experience more intuitive and guiding. The creation and usage of Web sites is easier and combined in a single overview. With the “View on Site” functionality you can instantly view the final results in the context of a webpage. The Promote and Demote functionality makes it very straightforward to reorganize and structure content.
Besides the mentioned functionality we squashed a lot of bugs and introduced other minor features, such as displaying user names in a more readable format, enhancements to the Publishing dialog and Publication properties.
And of course we continue to develop and improve SDL Web, so stay tuned!
The next blog post will give a preview of the modules Experience Optimization and Audience Manager

 Translate
