Welcome to my attempt to introduce you to Digital Experience Accelerator (DXA) in a 7 days posting marathon, explaining how DXA works, what are the ways to use it and how you can contribute.
But first of all, what is Digital Experience Accelerator or shorter named DXA ?
DXA is an open source product build on top of the very popular framework DD4T (Dynamic Delivery 4 Tridion), available in Java (https://community.sdl.com/developers/tridion_developer/m/mediagallery/1241) and .NET (https://community.sdl.com/developers/tridion_developer/m/mediagallery/852).
DXA is intended to help you create, design and publish SDL Web (formerly known as Tridion) based websites, together with its out-of-the-box modules like Experience Manager, SmartTarget and Search.
In order to set-up the development environment for .NET, visit the community website to download the source files, https://community.sdl.com/developers/tridion_developer/m/mediagallery/852.
The following items are found in the zip file:
- Import package and scripts for the BluePrint
- HTML designs that are optional to use
- Code folders, used to connect to the SDL Core Services
- An available module for this version supported by SDL
- The src that we will be using for our project
- A prebuild web application of the src
- Web-ref- folders containing configurations for your live or staging website
- Information about the location of the documentation.
First step is to copy the content of the src folder into your code repository and make a clean initial commit. TIP; if you are using a Git repository, I strongly recommended to take a look at Git flows. More information about Git flows at the following link: http://blog.sourcetreeapp.com/2012/08/01/smart-branching-with-sourcetree-and-git-flow/
Second step is to create the .gitignore file. If you are not sure what to put in there, have a look at the one from DXA https://github.com/sdl/dxa-web-application-dotnet/blob/master/.gitignore
Last step is to copy and update the configuration files into our project. The files can be found in the web-ref-staging folder. Update the cd_storage_conf.xml with the staging databases that you are using.
All we have left to do is commit our code to the repository and we are ready to start our DXA development.
Now there are a few ways to develop and/or extend the default site project. One way is to add everything in the existing site project. Personally I’m not in favor of this method as it limits your flexibility and capability to develop in an agile way, not to mention adding additional complexity to any future upgrades that you plan. Instead of that, you might want to breakdown the development in modules, develop and deliver shippable products at every sprint.
Creating separate modules for functionality increases flexibility, re-usability and a cleaner, more transparent work environment. More about creating separate modules for functionality in the following blog posts. Meanwhile, let’s take a look at creating a site “module”.
The simplest way to do this is to use an (Open Source) Visual Studio Extension for DXA available at https://visualstudiogallery.msdn.microsoft.com/2e4c85a5-3f90-4f01-97e3-515cc99d9891.
It contains prefabricated project templates for a Site, Modules and other classes; handy for new developers to become familiar with DXA faster. During today’s post and in the next, we will be using it as a reference, helping to speed up things.
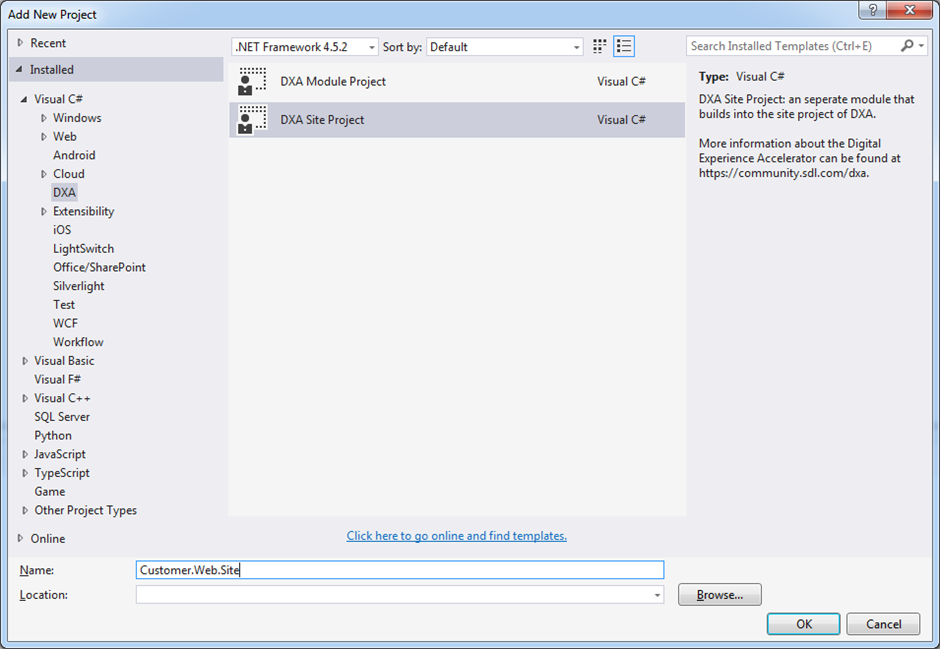
With the extension downloaded and installed, when adding a new project, the DXA option becomes visible below Visual C#, DXA. For our work today, select the Site Project.
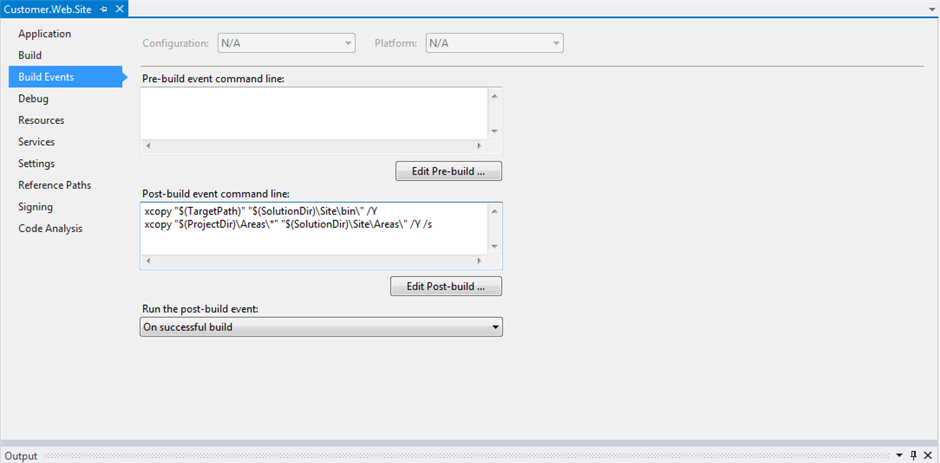
The newly added site project has by default a folder structure with an Area for your views, Controllers and Models. It contains a disabled build event that can copy the Views, DLLs, etc. into the site project when removing the rem in the "Post-build event command line".
At the moment of writing this post, the site project is missing two references namely, Sdl.Web.Common and Sdl.Web.Mvc. These references you can manually add yourself from the default site project.
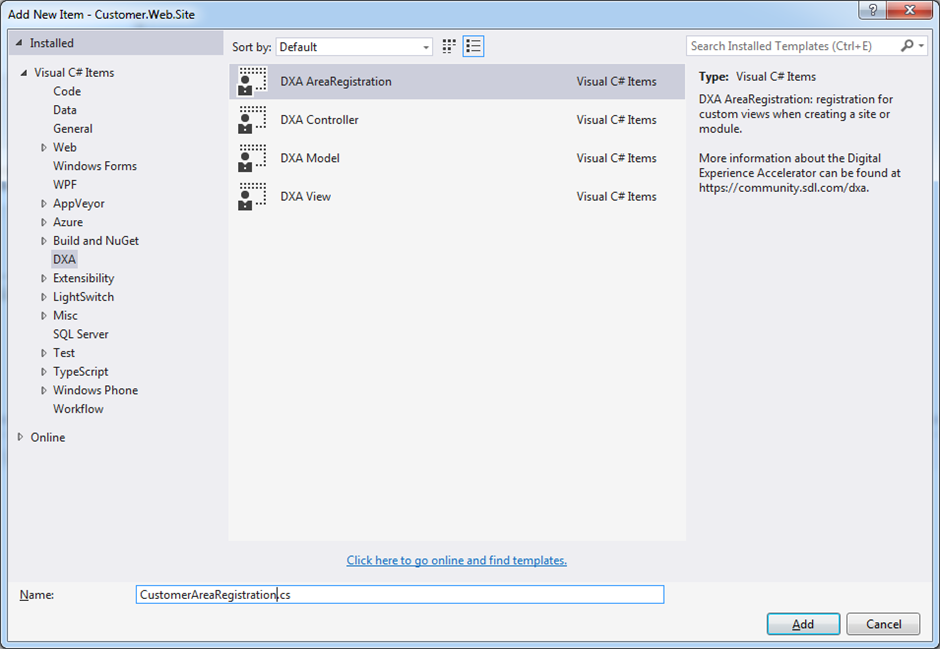
Now you can add an AreaRegistration class, this class is used by the web application to look up the strongly typed models and match them with a view. This can simple be done by adding a new item, as seen in the picture below.
I would recommend to rename the Areas/Site folder to Areas/Customer and update the Site in the CustomerAreaRegistration.cs to Customer too.
That’s it; you have setup your development environment and are ready to build your first DXA site with a clear separation of modules.
Hope to see you tomorrow for another DXA post [:$]

 Translate


