User Feedback is currently not automatically applied to a new language pair deployment. To apply already collected User Feedback to a new Generic, Adapted or AutoAdaptive Language Pair, you need to export the feedback for the desired source and target language and then import it to associate it with the new language pair.
Feedback filtering
Go to the Translate page, click on the Feedback History icon (under the target text box) and ensure you are in the All Feedback section.
In the Search Feedback entries menu, click on the dropdown arrow to expand the filter menu.

Apply the desired filtering criteria:
- Filter on the desired source and target language. Once the source and target has been selected, you can also filter on a specific model. If no model is selected, all available feedback for that source and target language is filtered.
Notes:
- If feedback has been submitted for both a Generic and an adapted language pair, it is best not to specify the model, to ensure that all feedback, irrespective of language pair id, has been filtered.
- If you only need the feedback from a specific language pair, select the desired model
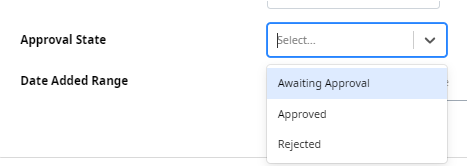
- You can also filter based on the "Approval State". Multiple values can be selected from the list menu.

Note: You can choose to filter all "Awaiting Approval" and "Approved" feedback, excluding feedback that has been rejected.
- You can select feedback based on a time range by specifying the "Start date" and "End Date". If you want to filter all feedback available on the portal, you do not need to specify the time range.
Once all filtering criteria have been specified, click on Search and the filtered results will be displayed on the screen.
Feedback export
To export the filtered feedback, click in the checkbox under the Import Feedback button 
Once the box has been checked, several menu options are displayed next to the checkbox allowing you to delete, approve, reject, or export all selected entries.

Click on the Export feedback icon  and select Excel (if a menu option is displayed).
Feedback review in Excel
In the downloaded feedback spreadsheet, you can do the following updates:
|
Column |
Column Name |
Action |
|
C |
Approval State |
Specify the desired state of approval for each imported entry. This will enable you to import feedback with any of the 3 possible states (awaitingApproval, approved or rejected). If you want all imported feedback to be automatically approved, there is no need to update the approval status. When you do the import you need to check the Approve All checkbox which will import all entries with the status "Approved". |
|
J |
User-Edited Translation |
Further edit the translation suggestion if needed. |
|
L |
Comments |
Provide a comment (optional) |
|
P |
Feedback Reviewed By |
Indicate the email of the person who performed the offline review if you want to capture this information in the portal. |
|
Q |
Language Pair Id
|
Specify the language pair Id to which you would like the imported feedback to be applied to.
|
|
R |
Date Reviewed |
Specify the date of review if relevant to capture this information in the portal (optional) |
Note: Only edit information in the above-mentioned columns.
Feedback import
Once you have finalized your review and updated the spreadsheet with the required information, go to Manage > All Feedback (or via Feedback History> All Feedback) and click on Import Feedback.
In the Import Feedback pop-up:
- select the file you want to import.
- check the checkbox Approve All only if you want all feedback entries to be automatically approved for the Language Pair Id you have specified.
Note: If you want the status that you have updated in the spreadsheet to be applied, do not select this option
- leave the Apply All unchecked
Then click on Import and all entries from the spreadsheet will be imported.

 Translate
