After setting up invoicing settings, e-mails, default terms we can start to prepare invoices.
There are a number of ways to prepare invoices.
Invoice creation from list of jobs
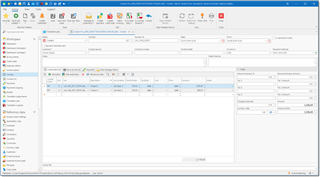
To automatically prepare an invoice, open Translation jobs list. Select necessary jobs and click Create invoice. In a result a new invoice form will be opened with pre-filled data from selected jobs.
A new invoice will be created, and you will see some details of the included jobs:
The program generates next invoice number based on the program settings, automatically selects Customer, Currency and Payment method. Program also automatically detects Payment term on the base of a customer's settings. Do not forget to check if a term was detected correctly.
Invoice status field determines invoice state. It can be Proforma, Created, Sent, Approved, Partially paid, Paid, Partially rejected and Rejected. If you enabled invoice protection in the invoice settings, then it won't be possible to edit or delete an invoice if it's status differs from Proforma or Created.
Each row in Invoice details table is linked with a job. It allows to track invoiced and uninvoiced amounts for each job. This means that you can create multiple invoices over a single job (for example, for long jobs which require partial invoicing). However, it is not necessary to link each invoice row with any job.
You can manually add new rows to the Invoice details table and leave Job column empty. In this case you can manually provide description and amount for a service included in an invoice. This could be additional expenses or special corrections. If you wish to charge your customer with additional expenses linked with some activity (provided that this expense is entered in the Expenses table).
You can use Add expense button above this table to add an expenses from the list of expenses. Popup window will be opened, allowing you to select necessary expense(s). Select OK and selected expense will be added to an invoice.
In the same manner, you can click Add job(s) button to add uninvoiced jobs for a selected customer.
To understand if invoice item is linked with a job or not, see first column in the table:
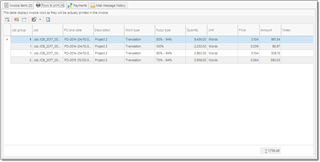
In the example above, Invoice details table contains information about 2 selected jobs (Description column is populated in the base of the Job name field). The Job contents column shows a source of job amount and a number of included rows (job tasks or job receivables). This number corresponds to a number of rows per each job which will be actually printed in the generated invoice. To preview these rows, switch to the Rows to print tab:
Here you can see detailed information about each job included in an invoice. And now it shows 4 rows, not 2 rows. This is because each of included jobs contains 2 tasks. So, in total we get 4 rows for printing in an actual invoice. Job group column helps to find out corresponding row in the Invoice details table.
Sort column in the table is used to sort invoice rows in the invoice printing form. You can use Move Up and Move down buttons on the toolbar to change the order. Alternatively, you can manually type sort order in the corresponding cell.
Partial factor column allow to issue partial invoices. Here you specify percentage of the total job's amount which must be included in an invoice. In this case corresponding jobs will be marked as Partially-invoiced. Quantity and Amount values will be decreased correspondingly. To see how this feature works, try to change a factor and then switch to the Rows to print tab to see that Quantity and Amount were correspondingly decreased. If a customer uses few currencies to estimate jobs, then it's needed to issue separate invoice for each currency.
Before saving an invoice, make necessary corrections: edit Description and Notes fields in the Invoice details table. Select taxes and discounts when needed, and check final amount. Taxes may be filled automatically if Default tax 1, Default tax 2 and Default tax 3 fields are filled for a selected customer (or if corresponding fields are filled in general application settings). Of course, you can change taxes selected by default or simply clear them.
Currency rate field contains a button to apply this rate to all jobs included in the invoice. This allows to recalculate amount in base currency in all jobs using one single currency rate. In the result, total sum of jobs expressed in the base currency will equal to the invoice amount in the base currency.
Select Save or Save and close button to save an invoice. In a result, included jobs will be marked as Invoiced.
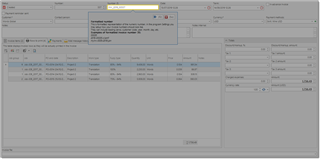
When you create invoice for the first time, short interactive tutorial will show main elements on the invoice editing form:
To manually open this tutorial later, select Show hints button on the ribbon.

 Translate
