


Hi,
Is it possible to tell me how I can import a Word file (including track changes) into Studio to make the changes it highlights to my translation (completed on studio also)?
Hi,
Is it possible to tell me how I can import a Word file (including track changes) into Studio to make the changes it highlights to my translation (completed on studio also)?
Hi,
There are three setting in Studio for importing word files and their tracked changes:

So if you use this option, to Display pending changes then you will see the tracked changes in Studio. If you want to translate the changes and show them as tracked changes this is trickier, but can be done. But I'd recommend you use a two step process for this as it would be very complicated otherwise.


When you save your target file the target will contain the working tracked changes. So a bit of a process... but if you think about it the task to do this in the first place is a bit of a task! Studio handles this pretty well I think.
Regards
Paul
Paul Filkin | RWS
Design your own training!
You've done the courses and still need to go a little further, or still not clear?
Tell us what you need in our Community Solutions Hub

Hi Paul,
Is this feature of working with track changes no more available? I'm exercising work with TC in Studio 2021 and it seams this options is removed.
Any idea how we may handle TC now in version 2021?

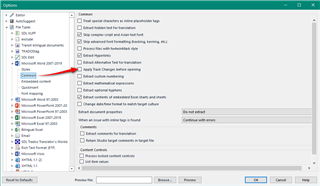
I assume you are referring to Word docx files. Per default track changes are applied when opening the file for translation.
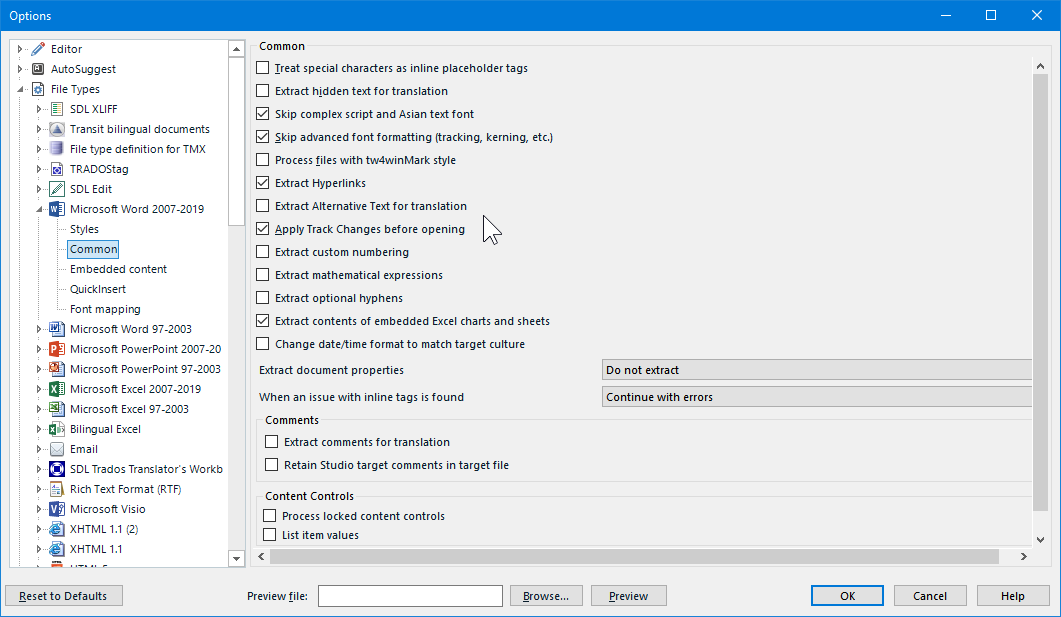
If you deselect this option BEFORE creating the project, your track changes should appear in the sdlxliff file.
_________________________________________________________
When asking for help here, please be as accurate as possible. Please always remember to give the exact version of product used and all possible error messages received. The better you describe your problem, the better help you will get.
Want to learn more about Trados Studio? Visit the Community Hub. Have a good idea to make Trados Studio better? Publish it here.

Works just fine for me:

The options changed a little so now you just uncheck this if you want to show the tracked changes. If you don't then the changes are applied by default before you start translating:
Paul Filkin | RWS
Design your own training!
You've done the courses and still need to go a little further, or still not clear?
Tell us what you need in our Community Solutions Hub
Works just fine for me:
The options changed a little so now you just uncheck this if you want to show the tracked changes. If you don't then the changes are applied by default before you start translating:
Paul Filkin | RWS
Design your own training!
You've done the courses and still need to go a little further, or still not clear?
Tell us what you need in our Community Solutions Hub
Hi Jerzy, Paul,
Thanks for your reply. Displays just fine – YES, with the Apply track Changes before opening unticked in the Project Settings.
In my first try I did that in the OPTIONS => File Types and it seems didn’t work. It took me a while to conclude that the Project Settings may prevail  Correct me if I confuse.
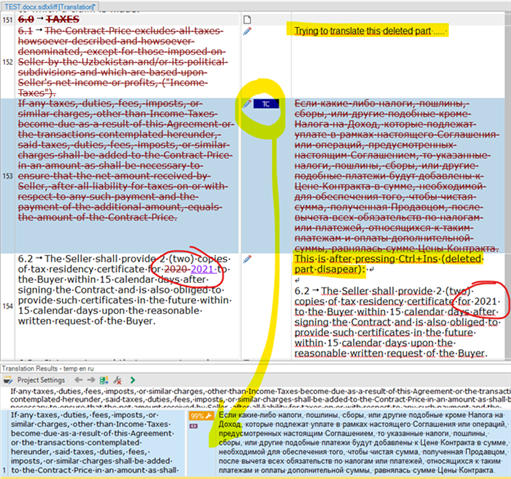
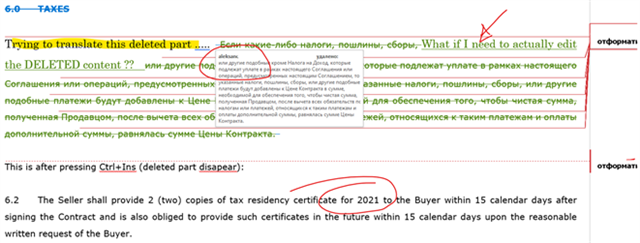
Now my TC do appear in the xliff file being edited but I do not catch how do I translate the segments/words which are crossed out as deleted.
Ctrl+Ins doesn’t copy parts of such text to the right side:
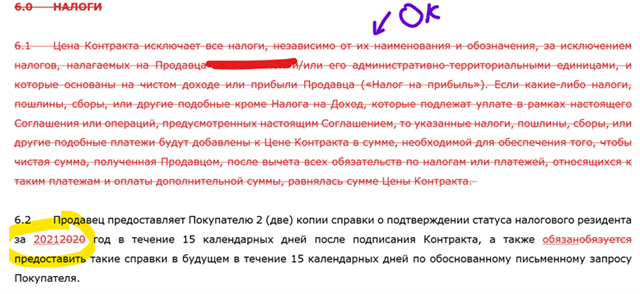
The TC segment No.153 actually came here from previously translated NOT REVISED (or say changes-rejected) file. And here is outcome after Shift+F12:
Note that now translation of the deleted part doesn’t constitute DELETED content, moreover it is marked with my name as the author of change, not the actual author appearing in the source Word file.
Now my question is how to work with that, how to translated a DELETED content so that client sees the document just like it was revised in the target language?
The menu Paul is describing in another post is not around here, thought it is exactly the tool required
==========
For the moment I have managed to achieve my goal by translating separately two files – with TC accepted and TC rejected. Then COMPARING them in MS Word:
This turns just like I was expecting and hoping, with the only point that it marks my name here as well.
Thnx
Alex
Hi Paul,
I appreciate if you can provide some guidance
Alex
Now my question is how to work with that, how to translated a DELETED content so that client sees the document just like it was revised in the target language?
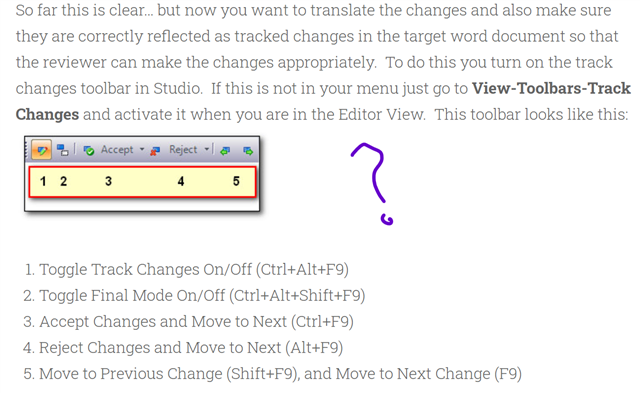
If you really have to translate the tracked changes then your workflow should be this:
You may even be able to do this in one go if you are able to clearly see what the original source was. Just do this:
The menu Paul is describing in another post is not around here, thought it is exactly the tool required
That article is years old. You'll find the same menu here in the Review ribbon:

For the moment I have managed to achieve my goal by translating separately two files – with TC accepted and TC rejected. Then COMPARING them in MS Word:
Why not... seems a smart way forward as well.
Paul Filkin | RWS
Design your own training!
You've done the courses and still need to go a little further, or still not clear?
Tell us what you need in our Community Solutions Hub
Thanks Paul, I will try and exercise this method during next couple translations.
However, it feels my name will be assigned to the revision author in any way ..
Thanks