Custom formatting rules allow you to apply some styling to rows and/or cells in lists based on a provided criteria. As an example, you may highlight unpaid invoices, undelivered jobs, assignments with approaching deadlines, projects with non-provided PO numbers, etc. In other words, any data which you can describe with allowed criteria syntax.
For highlighting data, Custom formatting rules allow you to choose the following formatting options:
- Font size
- Font color
- Background color
- Bold, italic, underline and strikethrough font
- Borders (left, right, top, bottom, with specifying border color and width)
- Custom CSS style
The latter gives unlimited styling possibilities, provided that you're familiar with CSS language. If not, you can always try to search in Internet how to achieve certain effect using CSS. For example, you can add custom image, render gradients, add shadows, masks etc.
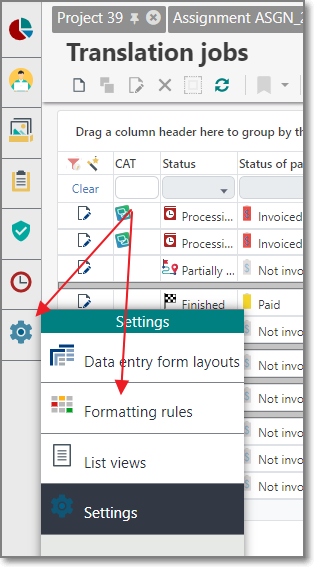
To start working with custom formatting rules, please open corresponding page, by clicking Settings > Formatting rules.

A page will be opened, where you can view and create custom rules. Workflow here is the same as with any list in TBM: you can add new entities, clone and edit existing rules, delete them, filter, etc.
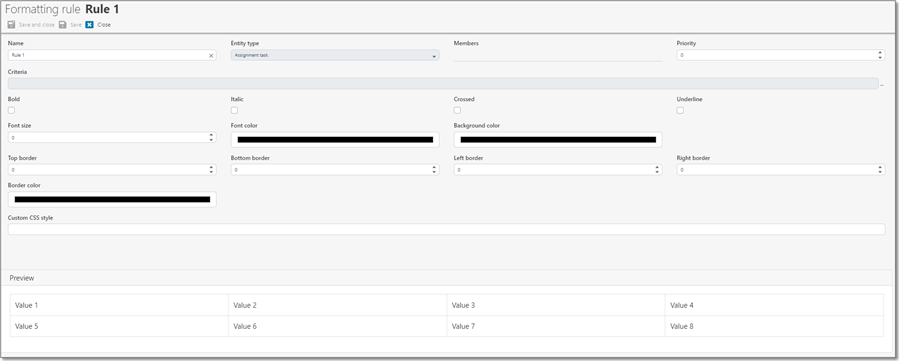
To create a new rule, click Add on the toolbar. The following page will be opened:

First of all, you have to provide rule Name, otherwise it won't be possible to save it. Next mandatory step is to select Entity type for which you wish to create a rule. Selected entity type specifies members available in the Members and Criteria fields. And, of course, to test created rule, you will have to open list of a selected entity type. In the example above, Assignment task is selected, which means that any translation assignment should be opened to test a rule, because translation assignment page contains Assignment tasks table, containing records of this type.
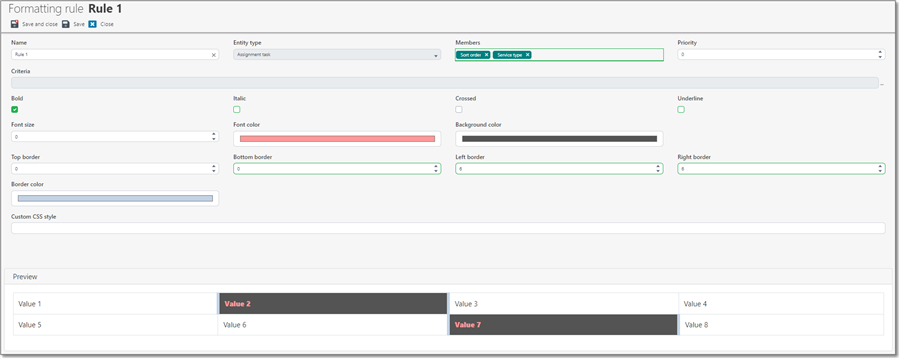
Then, you have to fill Members value. If to leave this field empty, custom formatting will be applied to the whole row. Otherwise, it will be applied only to specified cells. Take a note that if you select members in this field, corresponding columns MUST be visible in a list view.
Priority specifies an order of applying a rule, if you have multiple rules for the same entity type. A rule with lower value (higher priority) will override values specified by a rule with lower priority. In other words, it will be applied at the end, drawing all formatting over already applied rules (with lower priority).
Criteria allows to build filter string specifying when a rule should be applied. This article contains more information about building filters.
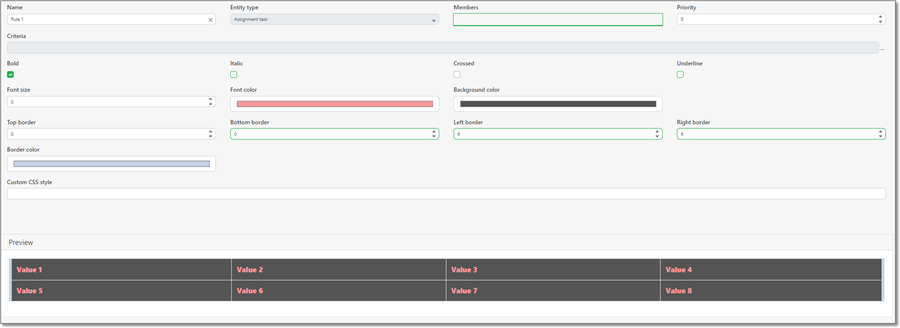
Next fields (Bold, Italic, Crossed, Underline, Font size, Font color, Background color, Border width, Border color) define a style of your formatting rule. When you change values there, Preview area displays an example how formatted cells and rows will look like with current values. For example, when no members are specified (rule is applied to a whole row):

Or same rule, but with some members specified:

To see how a rule looks with real data, save current rule, open a new tab in your browser and open corresponding list view there. After each of your rule, refresh second tab to see changes. This also can be useful when you have multiple riles for the same entity type, so see how they are combined together.
Finally, a lot of flexibility is provided by Custom CSS style field. It allows to provide custom string using CSS syntax to create any effect you like. For example, this string:
Creates this effect:

But the real value of this field is in possibility to provide custom images for cells (or rows). If you open TBM installation folder (doesn't matter if you use Essential or Team version), you can find wwwroot\images folder there. This folder contains all images (most of them are in SVG format) used in the TBM application. You can use any of these images, or even place your own images into this folder or to any other folder on your hard drive. Then, the following approach can be used in the Custom CSS style field to use custom image:
This string uses some image from the Other folder. Background image size is set to 24 pixels, and text left padding is set to 27 pixels, to prevent overlapping with background image.

Using this approach, you're free to use any image, regardless where it's placed (on your hard drive or in Internet), which provides a lot of flexibility when creating custom formatting rules.

 Translate