Keeping your RWS account up-to-date is essential for many reasons. Firstly, all contacts who should have access to your license information are listed on the account. Secondly, all contacts who should have access to your support portal are listed/given permission to use support from your RWS account. Last but not least, all notifications/announcements regarding your account are sent only to the contacts on your account. Therefore, maintaining the account is critically important and all the details should be checked at least once a month or whenever there is a change of contacts/license users.
How do I change my account details?
Your personal details can be easily updated from the ACCOUNT tab. Please login and go to your ACCOUNT tab:
Please be aware that the print screens are not from your RWS Account but the steps are the same:
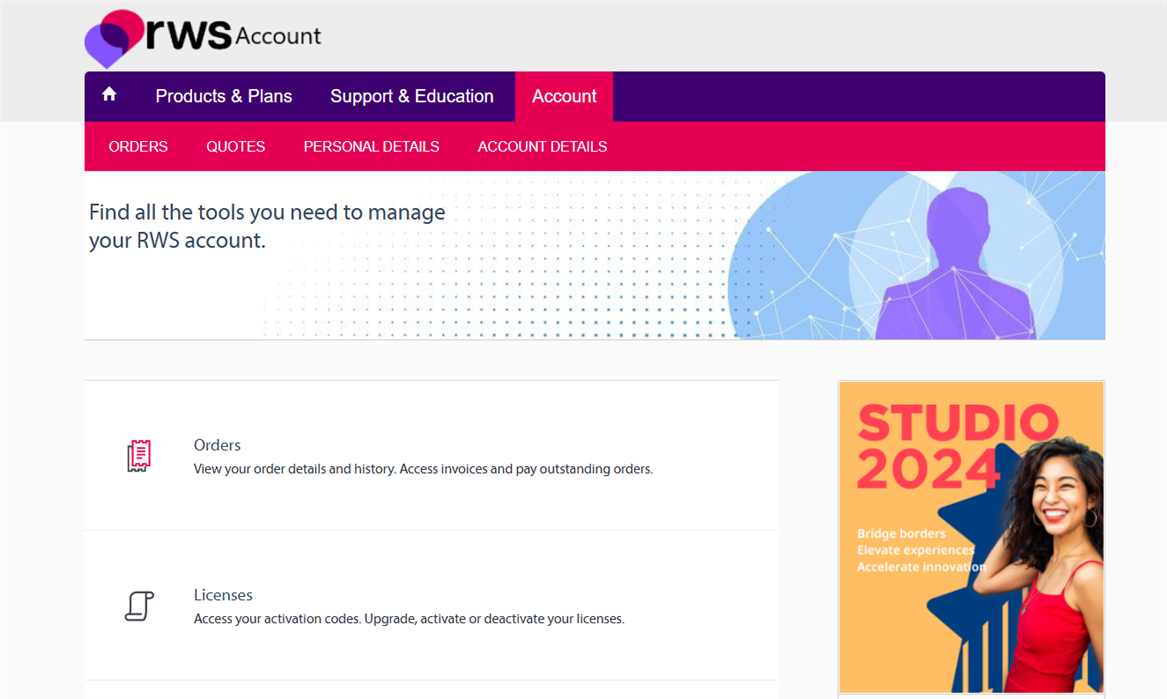
There are two sections that contain personal data: personal details and account details. In cases where there is only one user on the account, these two section will contain identical data. However, if your account has more than one contact listed then the PERSONAL DETAILS tab will list only the contact information of the person who is currently logged in.
On the other hand, the ACCOUNT DETAILS tab will display all available contacts.
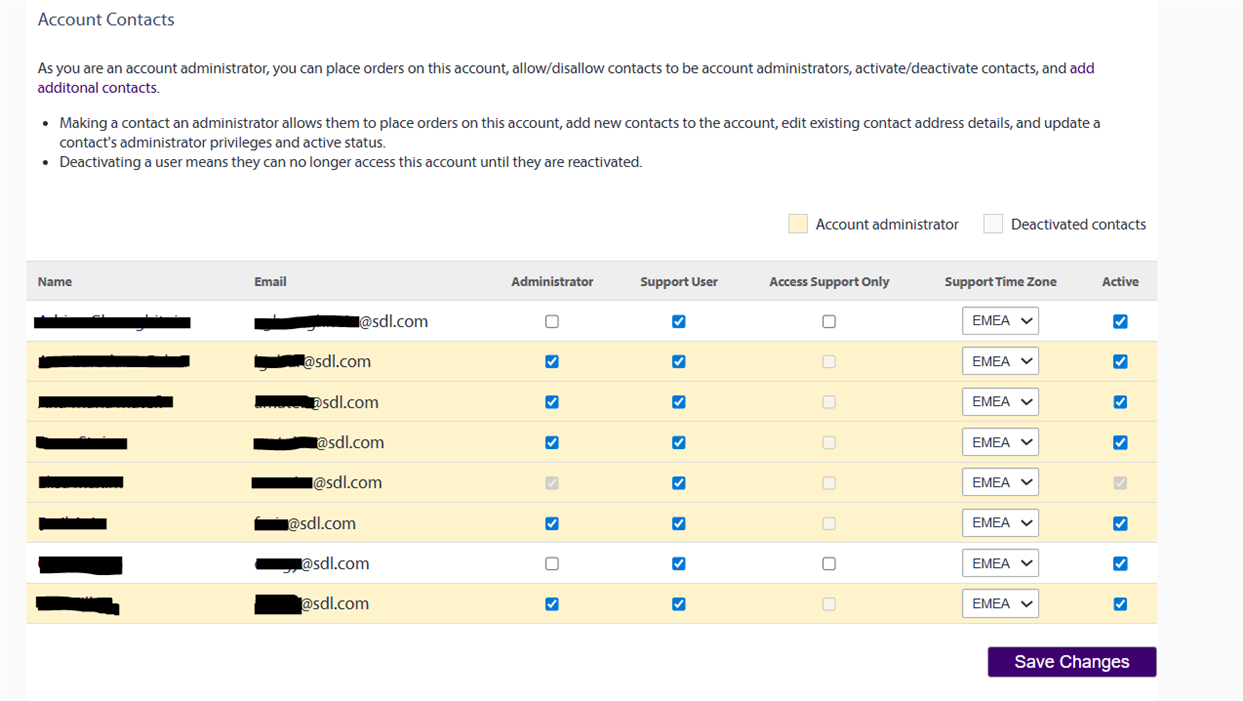
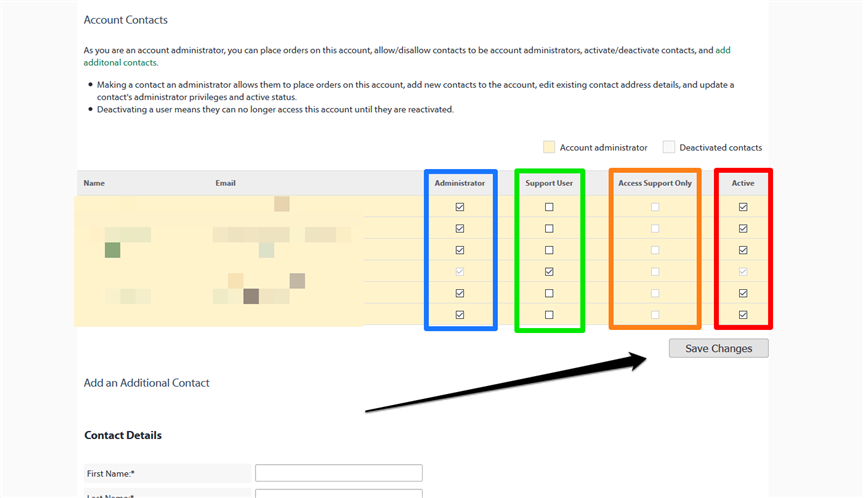
This tab can also be used to activate/deactivate administrators on the account (blue box in the screenshot below), change/add support users (green box), activate Support Only user (orange box – Support Only users cannot access your data like contacts, licenses, etc.; they can raise support tickets only) and deactivate certain users completely (red box). Please make sure that whatever modification has been made, you save it by clicking on the SAVE CHANGES button.
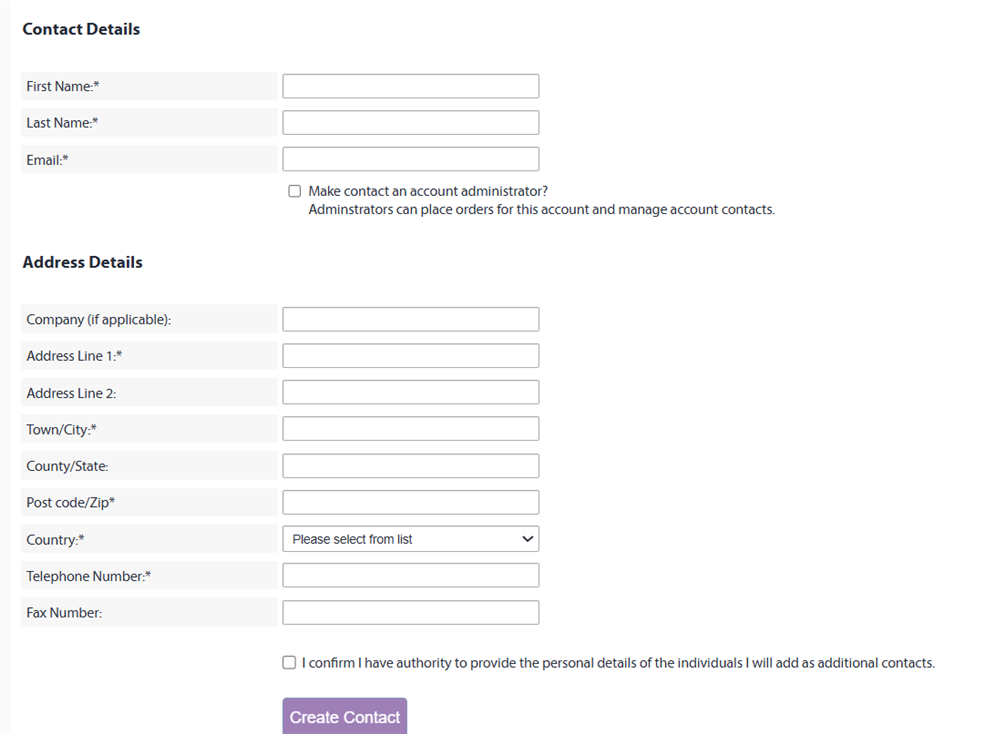
Adding new users is simple, while you are still on the ACCOUNT DETAILS page, please complete all contact details fields for a new user and click on the CREATE CONTACT button. The user has been added to your account:
Labelling your licenses
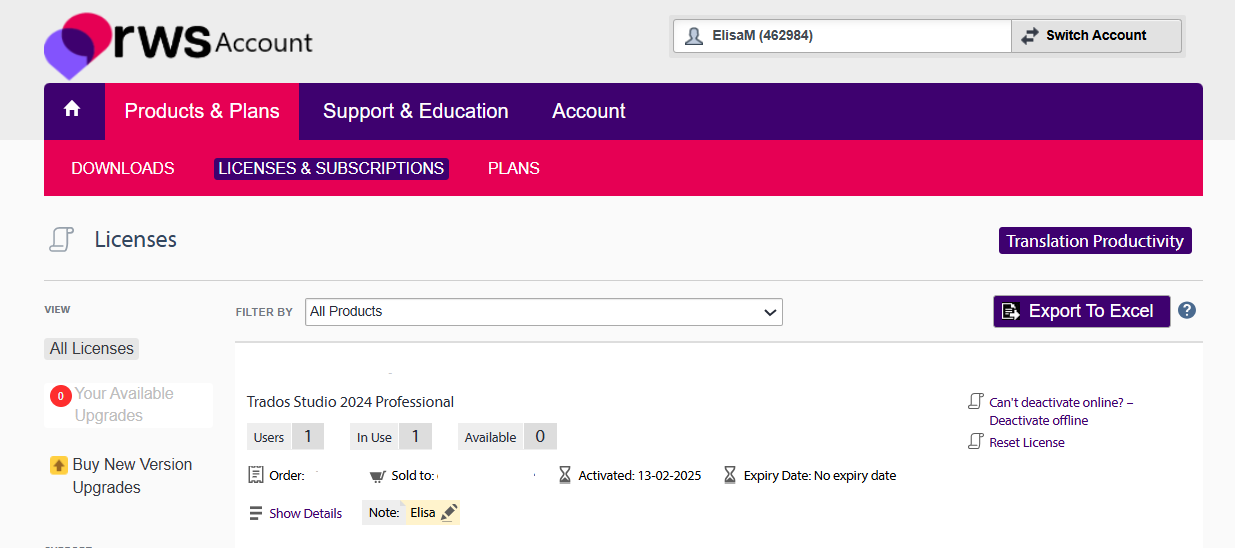
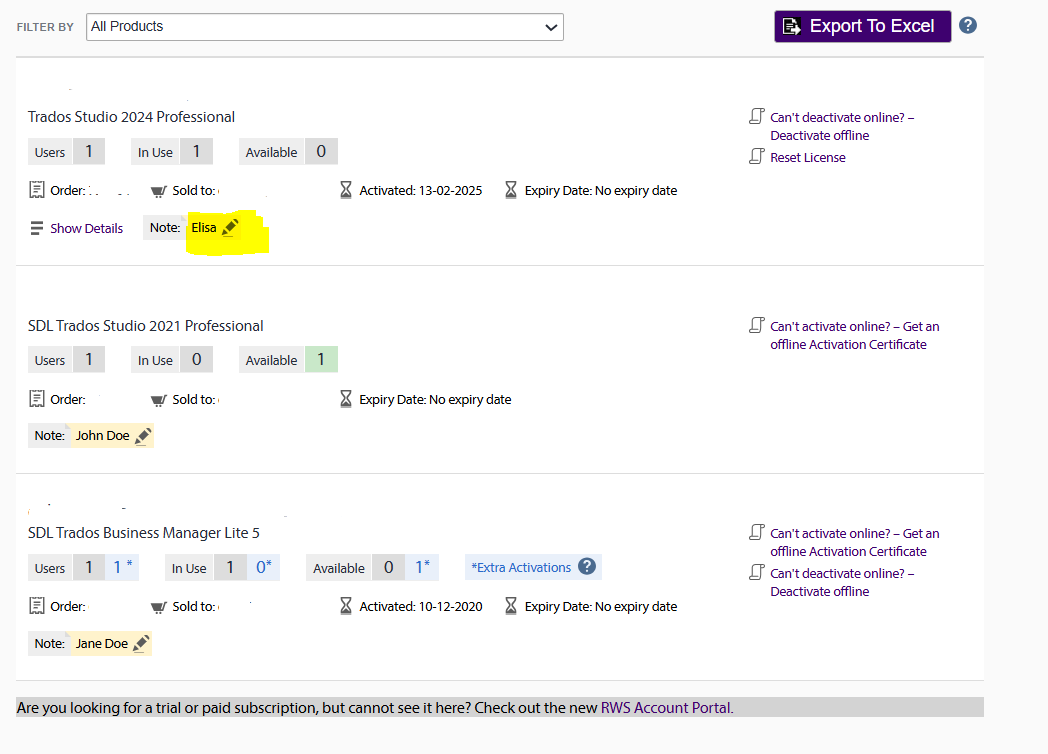
Adding a name of person (or a team) who is currently using a particular license is a very good practice as it enables account administrator to quickly locate who is using what license (this is especially true in the case of corporate accounts with multiple licenses). Going through a long list of just license codes can be waste of time. Instead, an account manager can add a name to a particular license and thus save time and effort. To label your license, please do the following:
Go to the PRODUCTS & PLANS section of your RWS account and click on the LICENSES tab, the page will list all your licenses. Please click on the NOTE section (red box in the screenshot below) of a particular license, add a name and click on the save button:
Your newly labelled license can now be quickly and easily found in the list:

 Translate
