Overview
Language Weaver is RWS's state-of-the-art secure machine translation cloud product for enterprises with various paid subscription models.
Setup
Language Weaver Plugin
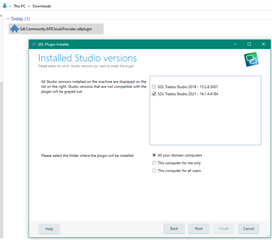
- You can download the Language Weaver plugin using the RWS App Store Integration from within Studio 2021 (or later), or from the RWS AppStore if you have an earlier version of Studio

If you have downloaded from the RWS AppStore, double-click the application, to start the installation and follow the instructions. You should have ADMIN rights on your computer to install.
(You may need to move the plugin from your downloads' folder to your desktop, as some browsers prevent installation directly from the download's folder)
Configuration
To add the provider to your project
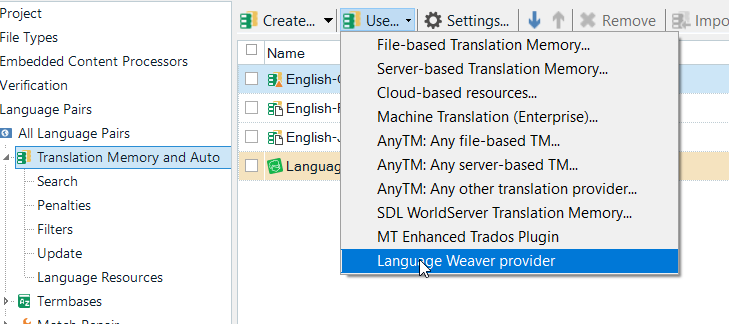
- Select Project Settings -> Language Pairs-> Translation Memory and Automated Translation
- Click on the button "Use..." and select "Language Weaver provider" from the drop-down list
Authentication
Language Weaver provides various methods for authenticating your credentials. Select the appropriate authentication type and provide the data that is required.
Authentication Type
- Single Sign-On - RWS Language Cloud
Inherits the SSO credential and 'Sign In' workflow from Studio - User credentials - Language Weaver
The same Email and Password that you use to log into Language Weaver - Client credentials - Language Weaver ClientID and secret
The Client ID and Client Secret can be retrieved by an admin user from Language Weaver

Note: For the user and client credentials type of authentication, you need to specify the "Account region" you need to connect to: Europe or US.

If for any reason your login credentials are incorrect, you will see a warning message.
Please check your logon credentials and Authentication type as explained earlier in this wiki.

Note: The authentication type "Single Sign-On" automatically inherits the SSO (i.e. Single Sign-On) credential and 'Sign In' workflow from Studio, so if you are already signed in, then that credential can be reused to authenticate you against Language Weaver.
Settings
To access the provider settings, select the "Language Weaver provider" from the project settings and click on the button "Settings"

The entries presented in the settings reflect the project language pairs, and are automatically mapped to the Language Weaver languages via the "Language Mapping" interface.
When loading the provider for the first time, the generic model will be selected for each of the language pairs. To choose a different model and/or dictionary, simply select them from the available options in drop-down menus appropriately.
The models and dictionaries for each language pairs will reflect what is available from your subscription.

Note: by default the Re-send draft and translated segments and Enable "Rate Translations" are checked.
To learn more about about the above configurations, click on the link and review the "Rate translations" wiki.
Additional features:
(available for Trados Studio 2019 and later)
- Add Term to Language Weaver Dictionary
Now it is possible with a simple right click (in Editor view) to add a term to your Language Weaver Dictionary.
To do this, go to the Project Settings and select the required dictionary depending on the language pair selected.
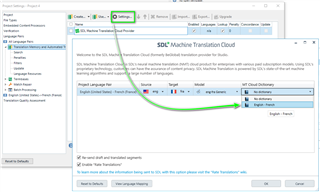
Return to the Project, select the source term and equivalent target term then right click on the source term and 'Add Term to Language Weaver Dictionary'

If the term has already been added, you will see the following error specifying that the "Term already exists"
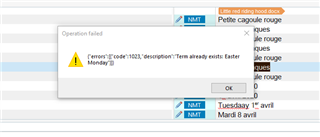
If partial text is missing from either the source and or target, a new error message will be generated
Tell Me
The SDL Machine Translation (soon to become Language Weaver) version compatible with Studio 2019 allows users to access the following actions using TellMe feature from Studio:
- Community Support
- Machine Translation Cloud contact
- Wikipedia documentation
- Download the plugin from AppStore


 Translate